
This post is part of the River Pond Quilt Along. You can find more info and the schedule HERE. While this content is directed toward the River Pond QAL, the same concepts can be applied to any quilt that you are making.
You can purchase the River Pond pattern HERE.
Do you have a plan???
So far in the quilt along we have:
- Figured out what your style is (by creating a collection of quilts you love – either on Pinterest or Instagram) and
- Dove deep into what it is about those quilts that you like – figuring out which elements actually draw you into the quilt, so you know what elements to incorporate into your quilt.
- Then we talked about color and design and
- Got out our colored pencils (or tool of choice) to come up with a number of different designs
- And finally, we decided (or are currently deciding) what we are going to make.
I am LOVING the coloring pages and fabric pulls that everyone is sharing in the Facebook group! Ya’ll are going to make some beautiful quilts! Hope over and check them out.
And if you’re on Instagram, be sure to tag your photos with #fbpRiverPond so we can find them and give you all the love!
Today...
I want to walk you through how to figure out how to cut your fabric if you are deviating from the pattern in regards to fabric placement.
For my quilt, I am replacing
- the centers of Blocks A, B, E, & F
- the background fabric in Blocks A, B, E & F
- in block B, I’m using fabric C instead of B.
Using the Key under Fabric Requirements, I labeled my coloring page the same, except where I’m replacing fabrics, I labeled the sections
- F1, where I’m replacing the center of the blocks of Fabric F; and
- G1, where I’m replacing the background fabric.
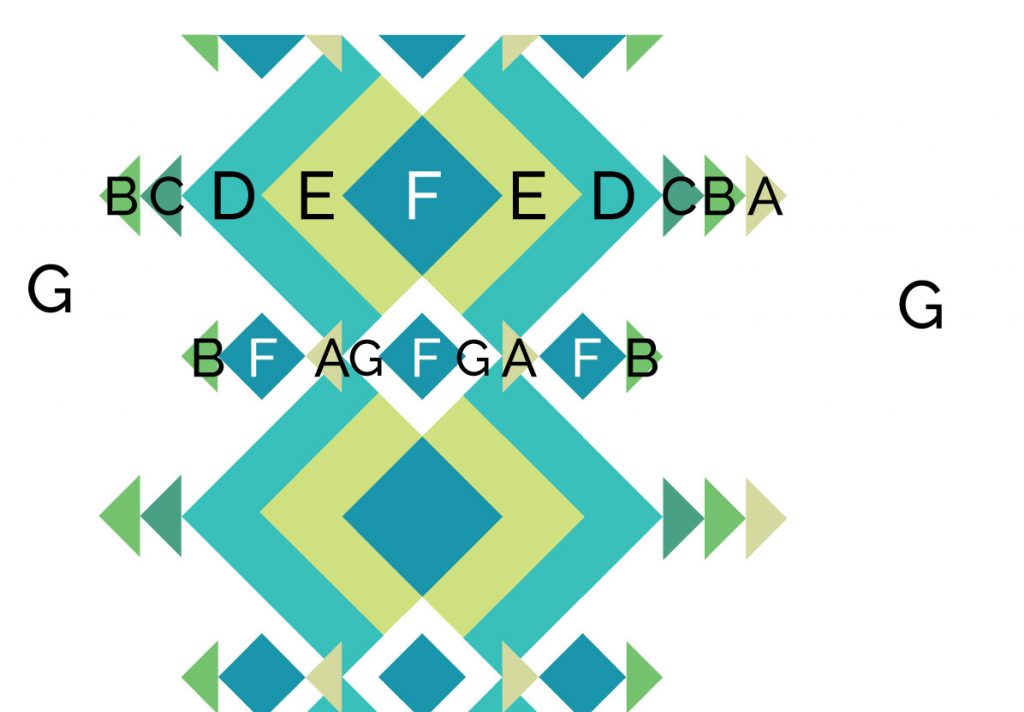
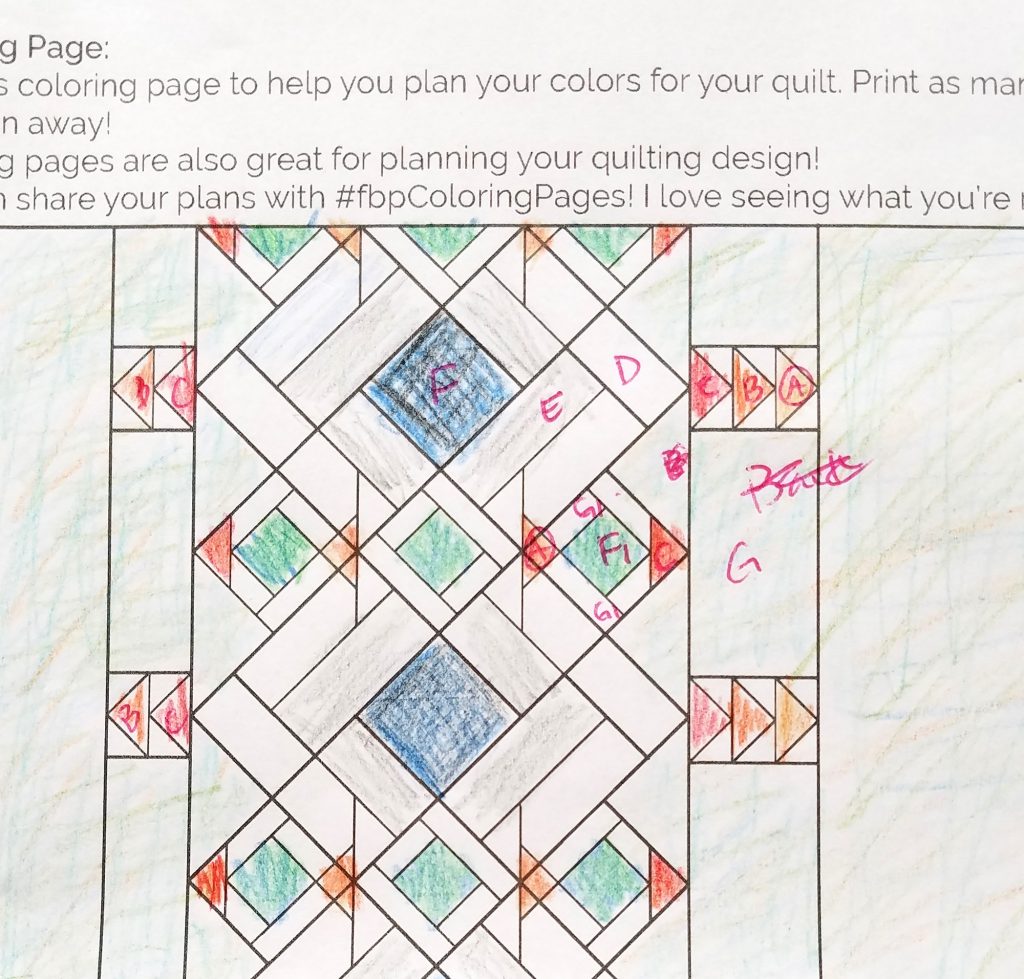
This makes it easier to visualize where I’m going to need to change out my fabric, as well as where in the cutting directions I will be removing cuts from.
Let's walk through this process...
so you’re ready to cut your fabric on Monday!
You might be replacing different fabrics than I am, but you can use this same process for your quilt. The more scrappy you go, the easier it will be to only reference the individual blocks for the cutting reference.
NOTE: the most recent updated pattern includes written amounts for cutting requirements as well as the diagrams under each block instruction. If you don’t know what I’m talking about, login and download the most recent version of the River Pond pattern.
Also note, there was one version where the written amounts had an error (another reason to get the update) but the diagrams have always been correct.
See corrections HERE. and how to download the most recent version HERE.
Adjusting Cutting Instructions
This was actually a hard post to put together without sharing my pattern to the world… so it’s a little wordy with not as many pictures as I’d like. If you’re struggling with how to make the adjustments and need more help, let me know. I can probably put together an extra add-on to the pattern that walks through this process more clearly.
I am a visual person, so I find it easier to reference diagrams. I don’t want adjusting your design to be too complicated, so hopefully this makes sense to you and will make it as hassle free as possible. If you find yourself stuck, let me know and I can help you out.
Step 1:
Referencing the Fabric Requirements Key on page 2 of the pattern, identify the fabrics in your quilt where the fabric varies from the pattern.
Step 2:
Reference the individual blocks under the Assemble Blocks instructions, starting on page 4 of the pattern, to see exactly which fabrics you need to change.
*If you’re going scrappy, simply use the cutting instructions under each individual block, starting on page 4, to cut your fabric.
Step 3:
Looking at the cutting instructions,mark what you need to change.
Here’s what my page looks like where I’m changing fabric G. (I crossed out all the info (sorry – you’ve got to buy the pattern! 😉 ) so it’s kind of messy. But maybe this will more resemble what your pages will look like too. lol.
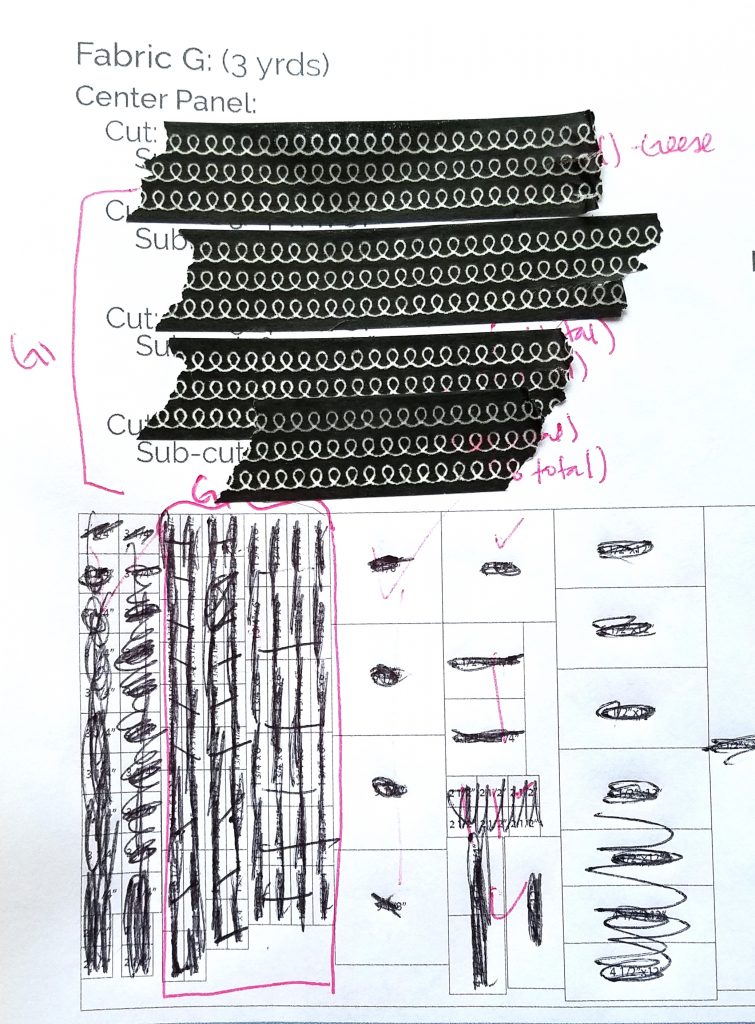
You can see how I marked off the written instructions as well as the diagram sections, so I can easily see what I need to cut from each fabric.
If you are making this same change for your quilt, you can use this as a guide.
I’m also including how I marked up my fabric cutting diagrams for changing some of the B fabric to C; and some of the F fabric to F1.
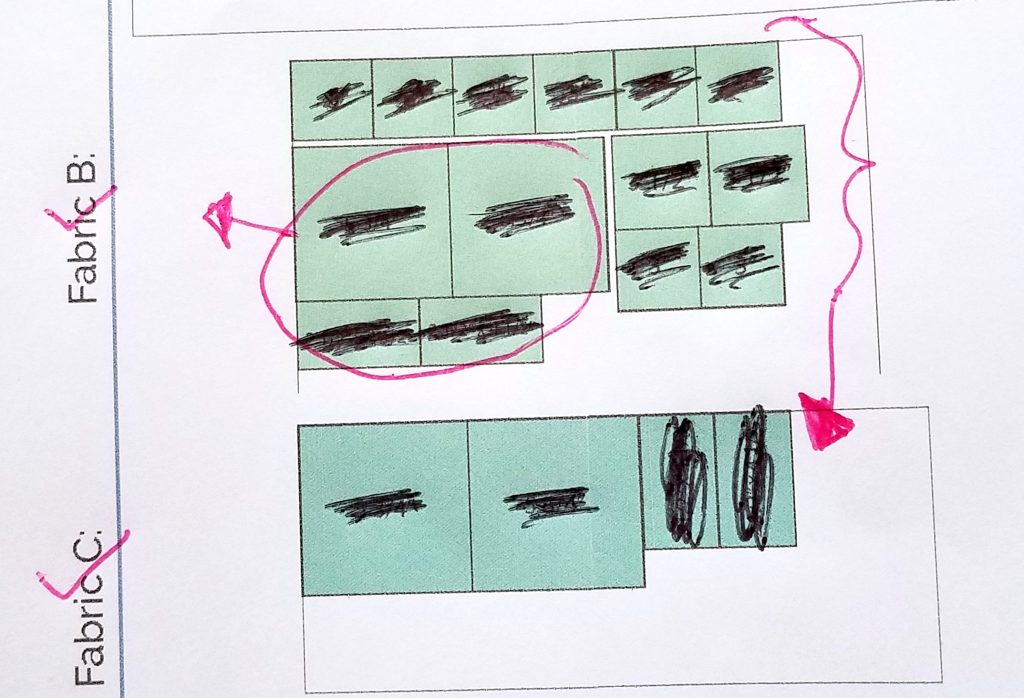
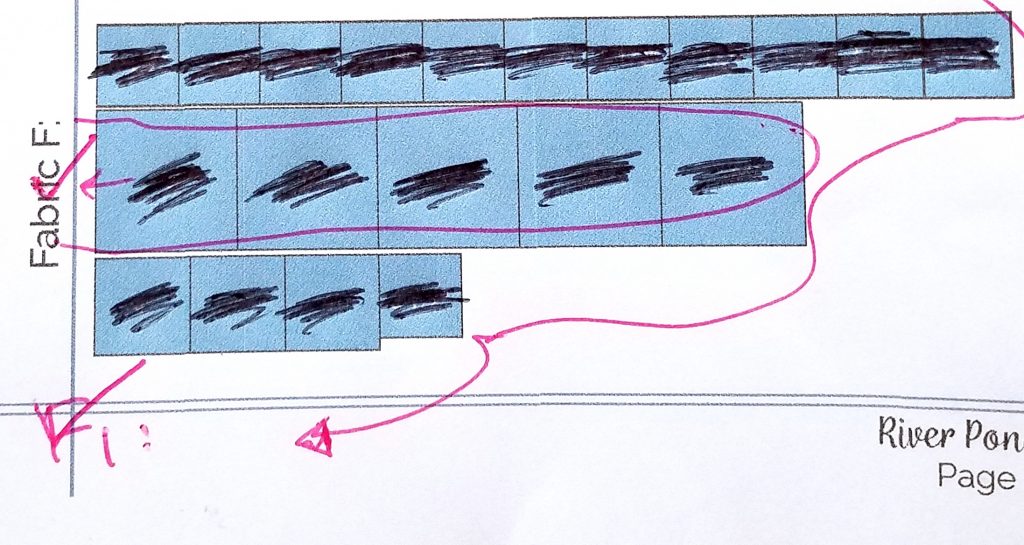
I like crossing off the diagram squares as I’m cutting to help me keep track of what I have already cut and what I still need to cut.
Does that help???
or are you now just super confused???
If you’re confused, just wait until you need to figure out your cutting and then come back. It will hopefully make more sense when you get to this point in the process.
Hopefully doing this will also help you figure out how much fabric of what you’ll need, which if you’re purchasing fabric, you’ll need before you can cut.
Homework
Get caught up with the QAL if you’ve fallen behind…
- make a plan
- pick your fabrics
- gather your fabrics
- get ready to start cutting on Monday!
I always feel like this is the most time consuming part of making a quilt. Once we get everything cut and start making the blocks, it’ll go really fast! (but don’t jump ahead too much. I have some tips for assembling the blocks that you might want to wait for… though you don’t have to.)
Join the conversation!
Join the From Blank Pages Community on Facebook to see what others are making, give feedback on others questions, share your progress and plan, get inspired, and meet other awesome quilters!
If you’re on Instagram, tag me, @fromblankpages, and use #fbpRiverPond so we can all see what you’re up to and comment!


I had sent a message about an updated pattern for River Pond and I never received anything back from you. Let me know what I need to do to get a copy.
Thank you,
Brenda Johnson
mbljohnson@nvc.net
Messaged you today! 🙂