Hey y’all! How’s it going?! Are you ready to get started with your Home Lovin project??
My plan for my blog posts are to help walk you through each step of the creative process. There will be a lot of things that may seem obvious, or things that you think aren’t that important and tend to skip over them or rush through. But everything I’ll share is important and when done step-by-step will help ensure that you absolutely LOVE your finished results!
The CREATIVE PROCESS isn’t just about finishing something, it’s about connecting to your creativity in every step along the way. Yes, that means that we also focus on the steps that are our least favorite… but doing things that are uncomfortable make us better and stronger. And trust me… there are so many steps in designing patterns, creating a business, making quilts, that I don’t love, but doing them over and over again year after year has definitely made me better than I was when I started, and the things I’ve learned along the way are things that help me more than I could have realized.
Does this all sound hoaky and maybe you’re thinking, “it’s just quilting! who cares about connection and growth. I just want to make a quilt?!” Well, that’s fine too. But for me quilting is so much more than making something awesome. Every step, every stitch, every finished project is a journey and a process and I’m passionate about connecting with the blessings that quilting can provide.
I definitely won’t be all touchy feely as I we continue forward, but I hope you can have fun and listen to your creative voice as you join me through this process!
Before we begin, I want to let you know that I updated my blog so you can know subscribe to my blog and automatically receive updates in your favorite blog reader, or receive posts in your inbox. I will also send updates in my newsletter of the most recent posts, so you can always come back and read them that way as well. (You can sign up for my newsletter HERE.)
Alright, let’s get started!
Step 1: What are you going to make?
The first thing we need to do is plan what it is we’re going to make!
What I'm Making
I'm going to make a quilt with 25 - 14 inch blocks, in a 5x5 layout. It will finish at 70 inches square - which I love because it's long enough for my tall husband, and has plenty of room for lots of us to snuggle under on the couch. 🙂
Other ideas:
- Pillow
- Bag
- Mini Quilt/Wall Hanging
- Smaller Quilt
- Table Runner
- What other ideas do you have? Leave a comment and I'll add your ideas to the list!
Part of planning on what you’re going to make is figuring out how many blocks you’ll need. If you’re making something small, you might only need one block – like for a pillow, bag, or wall hanging. If you’re making a baby quilt or table runner you might use up to 4 blocks. If you’re making a larger quilt, here are some things to think about:
- How big do you want the quilt?
- Would you need to use 12 inch blocks or 14 inch blocks?
- Do you want your quilt to be all house blocks? or do you want to arrange them in a way that will give you more negative space? For example, you could have 5 - 12 inch houses along the bottom of the quilt only, or or stagger your blocks with each row, or arrange them using sashing to create "roads" and make a village quilt. So many possibilites!
- Are there questions I left off? What are things you think about when planning your layout?
These questions don’t have an order to them, and the answer to one question might change the answers you already made to a different one. It’s an organic process trying to plan out your ideas, so be open to let the ideas flow and write down/scribble all your ideas as they come and watch how your project transforms!
The more time you spend playing around with different ideas, the more you’ll see your creative juices start to flow! And that’s when great ideas come about!
If you spend some time on this step, I hope you’ll share some of your ideas with us! I can’t wait to see what you come up with!
Step 2: What is it going to look like?
Once we have our initial plan and overall layout, we need to start fine tuning the smaller details like color! This can be a fun and at least for me, often a very time consuming process. But careful planning in this step is KEY! Skipping this step leads to lots of tweaking in the end, and can often lead to less than fabulous results because we end up just throwing it together, or even just put it aside and never pick it up again.
Mind you, I am not one to just throw things together. Truly scrappy for me is truly ugly! So perhaps I need to work on that as it’s not one of my strengths. But anyone can be successful when they put a little prep into planning! It’ll cut down on frustration and will help you bust through that project and make sure it gets done!
What you'll need:
- Print out the coloring pages from the pattern
- Regular lead pencil or black pen
- Colored pencils, crayons, or makers - something to add color with
The different coloring pages each have their benefit when it comes to planning your project. The large layout page isn’t just for larger quilts, but also provides a quick way to test out different block ideas without taking the time to color an entire page. Once you come up with some designs you like, you can fine tune them on the single block coloring page, and then transfer the design to the labeled page once you’re ready to start quilting.
The coloring pages are also a great tool to plan your quilting designs when you’re done with the quilt top or block! You can easily doodle FMQ or hand quilting designs to see what will fit and look good, without having to unpick anything.
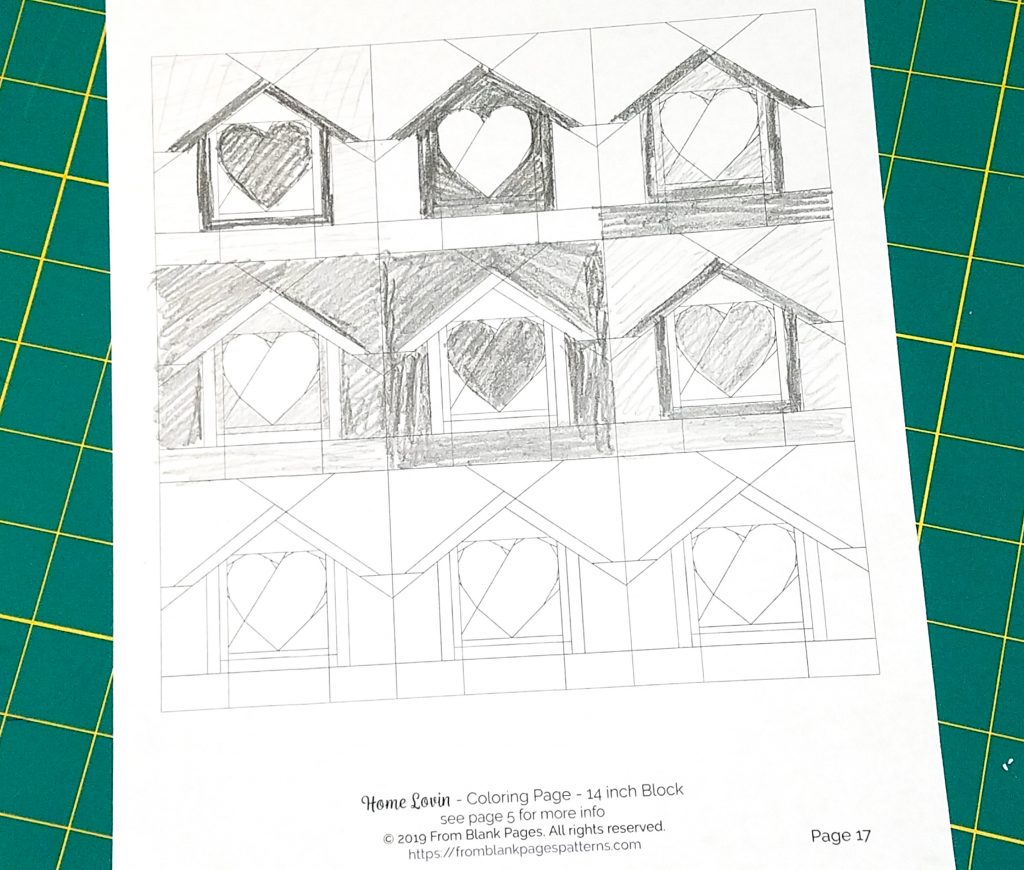
1. Color your page in black and white to determine design and value placement. This might not be as necessary with this pattern, as it’s a more simple design. But especially on more intricate patterns, this is a really useful step! But even with the Home Lovin pattern, you’ll be able to explore different design options easily with this step.
2. Once you have your design idea, start adding in color. Decide on where you want what fabrics, and take some time trying different color combinations! You can check out my post on Color & Design to learn more about color combinations and how to pick colors that work well together.
What I'm Making
The reason why I suggest coloring your pages in black and white first, and waiting to add color, is because then you can really concentrate on the design you are creating. We can get so distracted with choosing the right color combinations that we miss being in control of the actual design entirely! This helps cut down the overwhelm and keeps us focused.
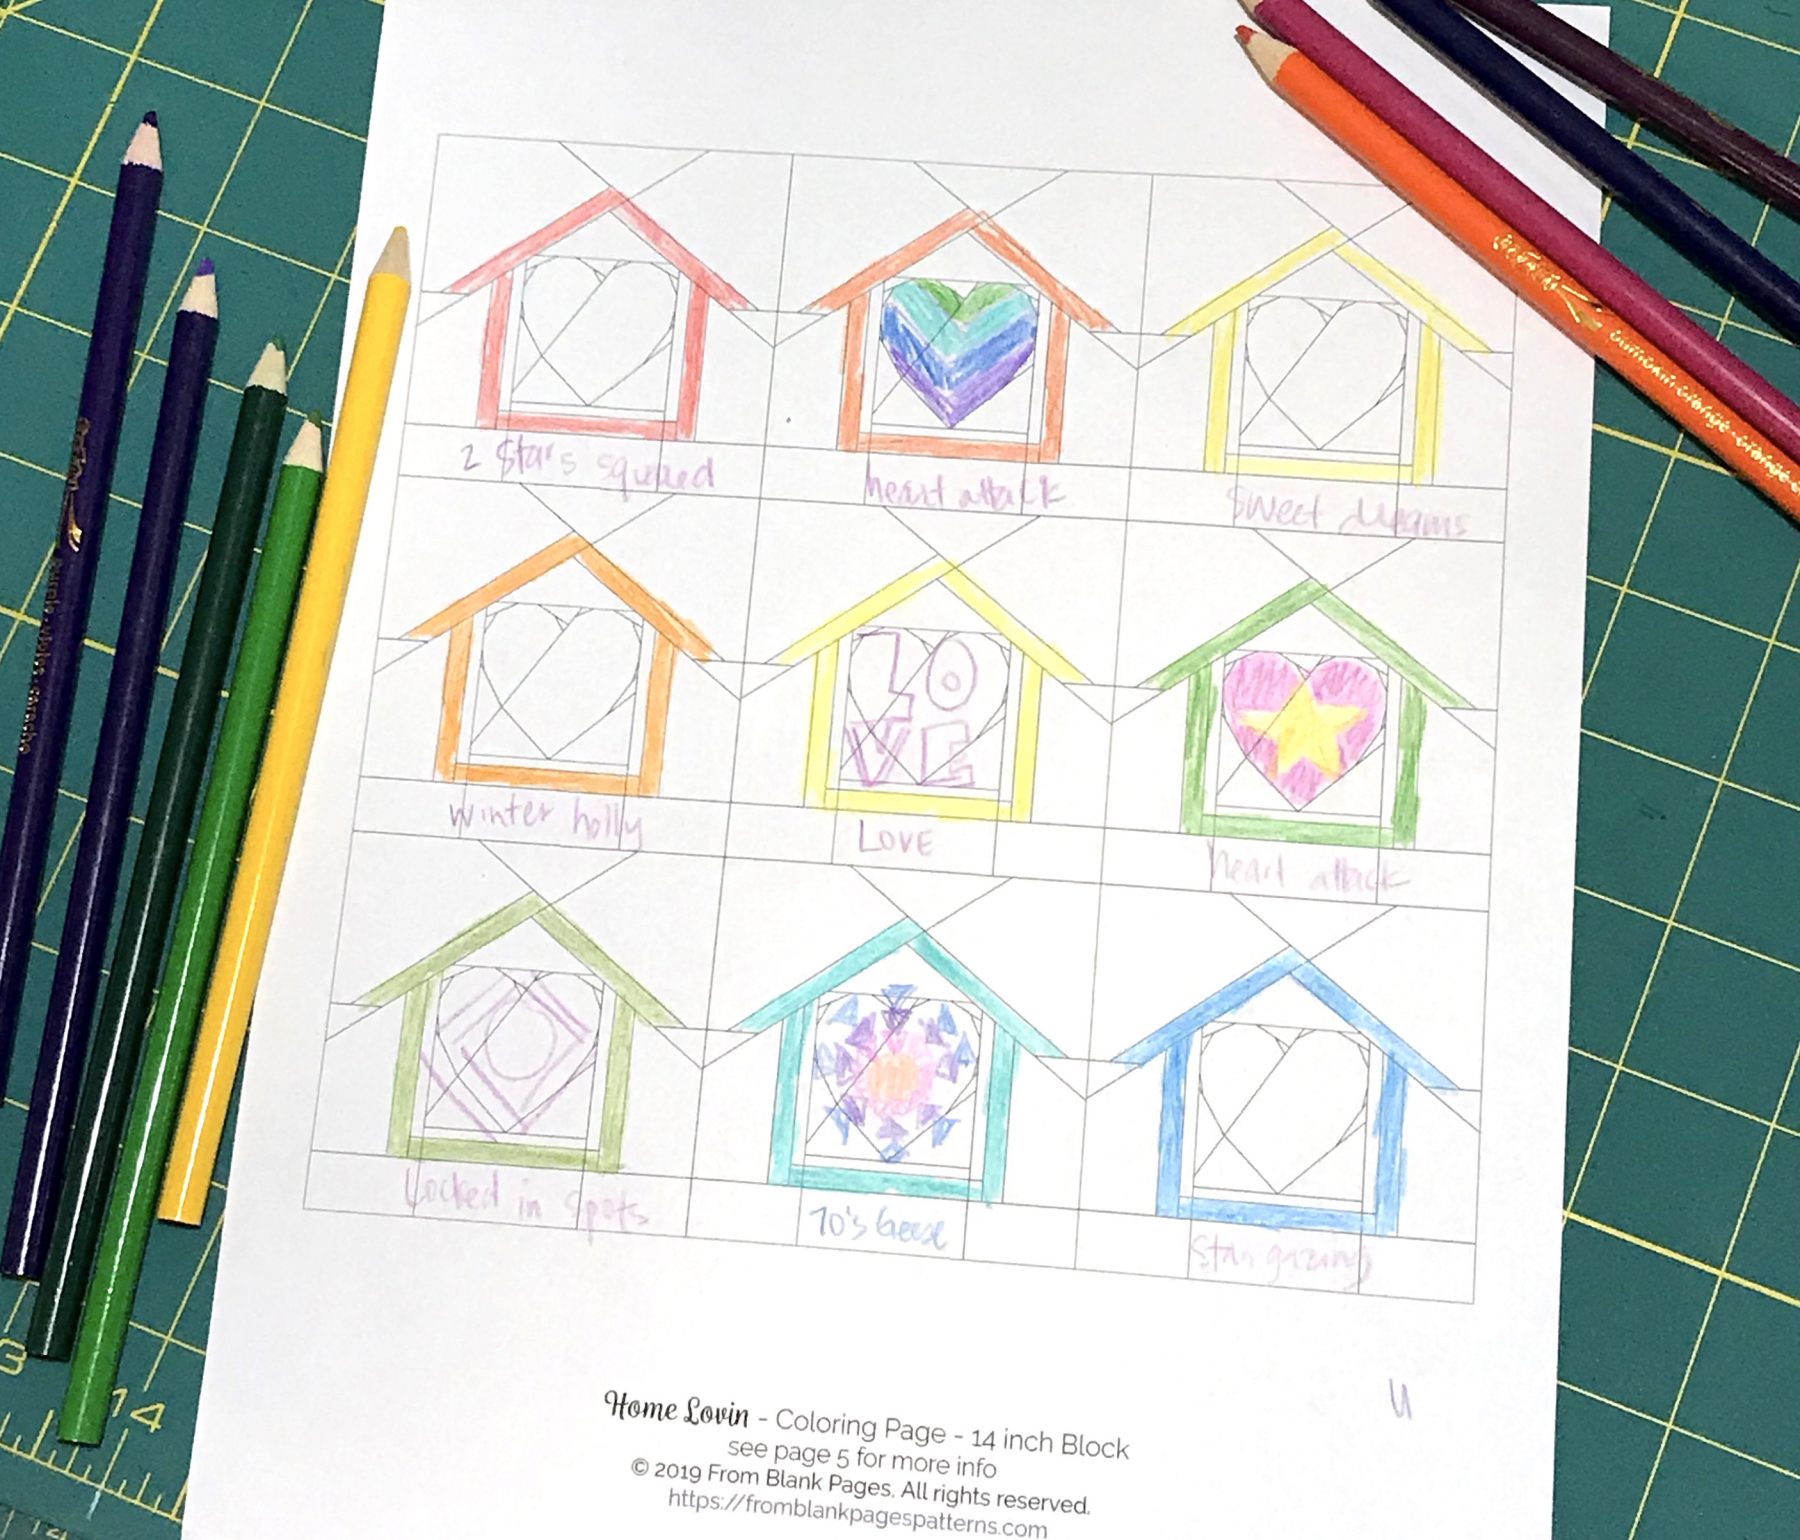
I’m going to use the top left design for all of my blocks in my quilt.
The top center design and the middle right designs are what I used for the 12 inch blocks that I have already shared.

I’m going to create a rainbow of 25 houses for my quilt, in a 5 x 5 block layout. The coloring page doesn’t make room for that many blocks, but that’s ok. I have a solid plan of what I’m going to do and can solidify the color placement once I pick my fabrics.
I’m also going to replace some of the hearts with my other 6 inch quilt block patterns that I have. Here I colored in 2 Heart Attack hearts (the Log Cabin and the Star), and kind of drew in my 70’s Geese block, Locked in Spots, and LOVE blocks. I wrote in a few other patterns I’m planning on using as well: 2 Stars Squared, Sweet Dreams, Winter Holly, and Star Gazing.
That's it for now!
We’ll talk about picking fabrics and fabric requirements in the next post. So don’t worry about that yet… for now just have fun playing around with ideas!


[…] already covered planning your project and getting a good idea of what it will look like in this post here. If you missed it, be sure to go back and read through it before you move on to picking […]
[…] us in the Home Lovin QAL! If you haven’t already gone over the other posts, start with Plan your Project and Pick your Fabrics before continuing […]