This post is part of the River Pond Quilt Along. You can find more info and the schedule HERE. While this content is directed toward the River Pond QAL, the same concepts can be applied to any quilt that you are making.
You can purchase the River Pond pattern HERE.
The Finishing Touch
Making a quilt can be quite the process. And if you’re anything like me, once I stitch those last few stitches of the binding on, I’m ready to throw it in the wash and call it done!
But there’s that one last step that is oh so important but so easily overlooked.
The LABEL!!
What's in a Label??
“Are labels really that important?”
“I don’t need a label. I’ll remember that I made this, and so will my kids.”
“No one is going to care who made this quilt in 50 years.”
“I’ll put a label on later…”
So many reasons we don’t label our quilts. And yet, they are what turns a quilt into a story. What ties it to a person, a place, and gives a quilt it’s meaning.
so… don’t forget to label your quilt!!
Label Options
So where do we begin?? There are SO many ways you can label your quilt. I’ll share with you some different ideas, and then show you how I do it. 🙂
One idea is to buy quilt labels that you can sew onto your quilt backs. You can have some custom made with all of your details already on them, or you can fill out the information with a sharpie or other color fast pen.
Click HERE to see a variety of different label types on Etsy.
Tip:
If you write on your labels (I do like to use fine point sharpies) make sure you heat set the ink. This is SUPER easy! Just set a hot iron over your writing for a few seconds and voile! It’s heat set!
You’ll want to heat set your labels, or your fabric if you write right on the fabric.
Another way that you can get premade labels is to design them yourself and get them printed at Spoonflower.
Click HERE to see some quilt label examples.
Click HERE to see how to upload your own designs.
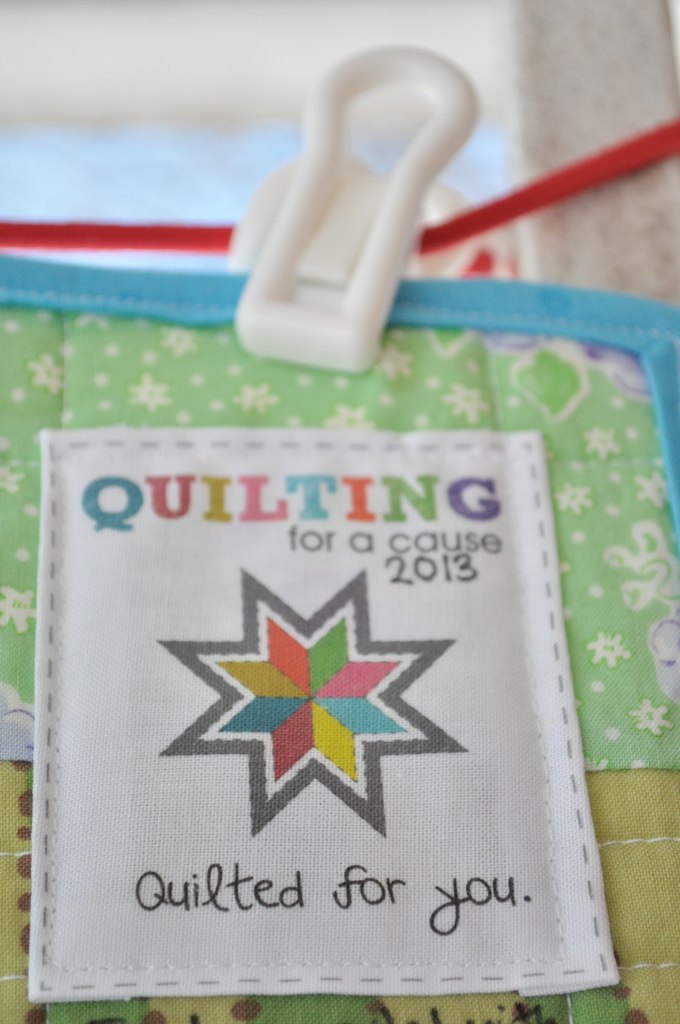
A friend made these labels lots of years ago when I was spending a lot of time working with Quilting for a Cause, making charity quilts. I LOVE this! Though they are no longer available on Spoonflower. But you can use this as an inspirational starting point.
Another option is to draw or write your own labels.
This is actually what I do. I am not fancy with my labels. As I alluded to above, I’m usually to the point of just wanting to be finished by this point, so it’s not something I usually spend too much energy on. Though maybe I’d be happy if I did go that extra mile.
A beautiful label is never wasted on any quilt. 🙂
Here are some samples of my labels:
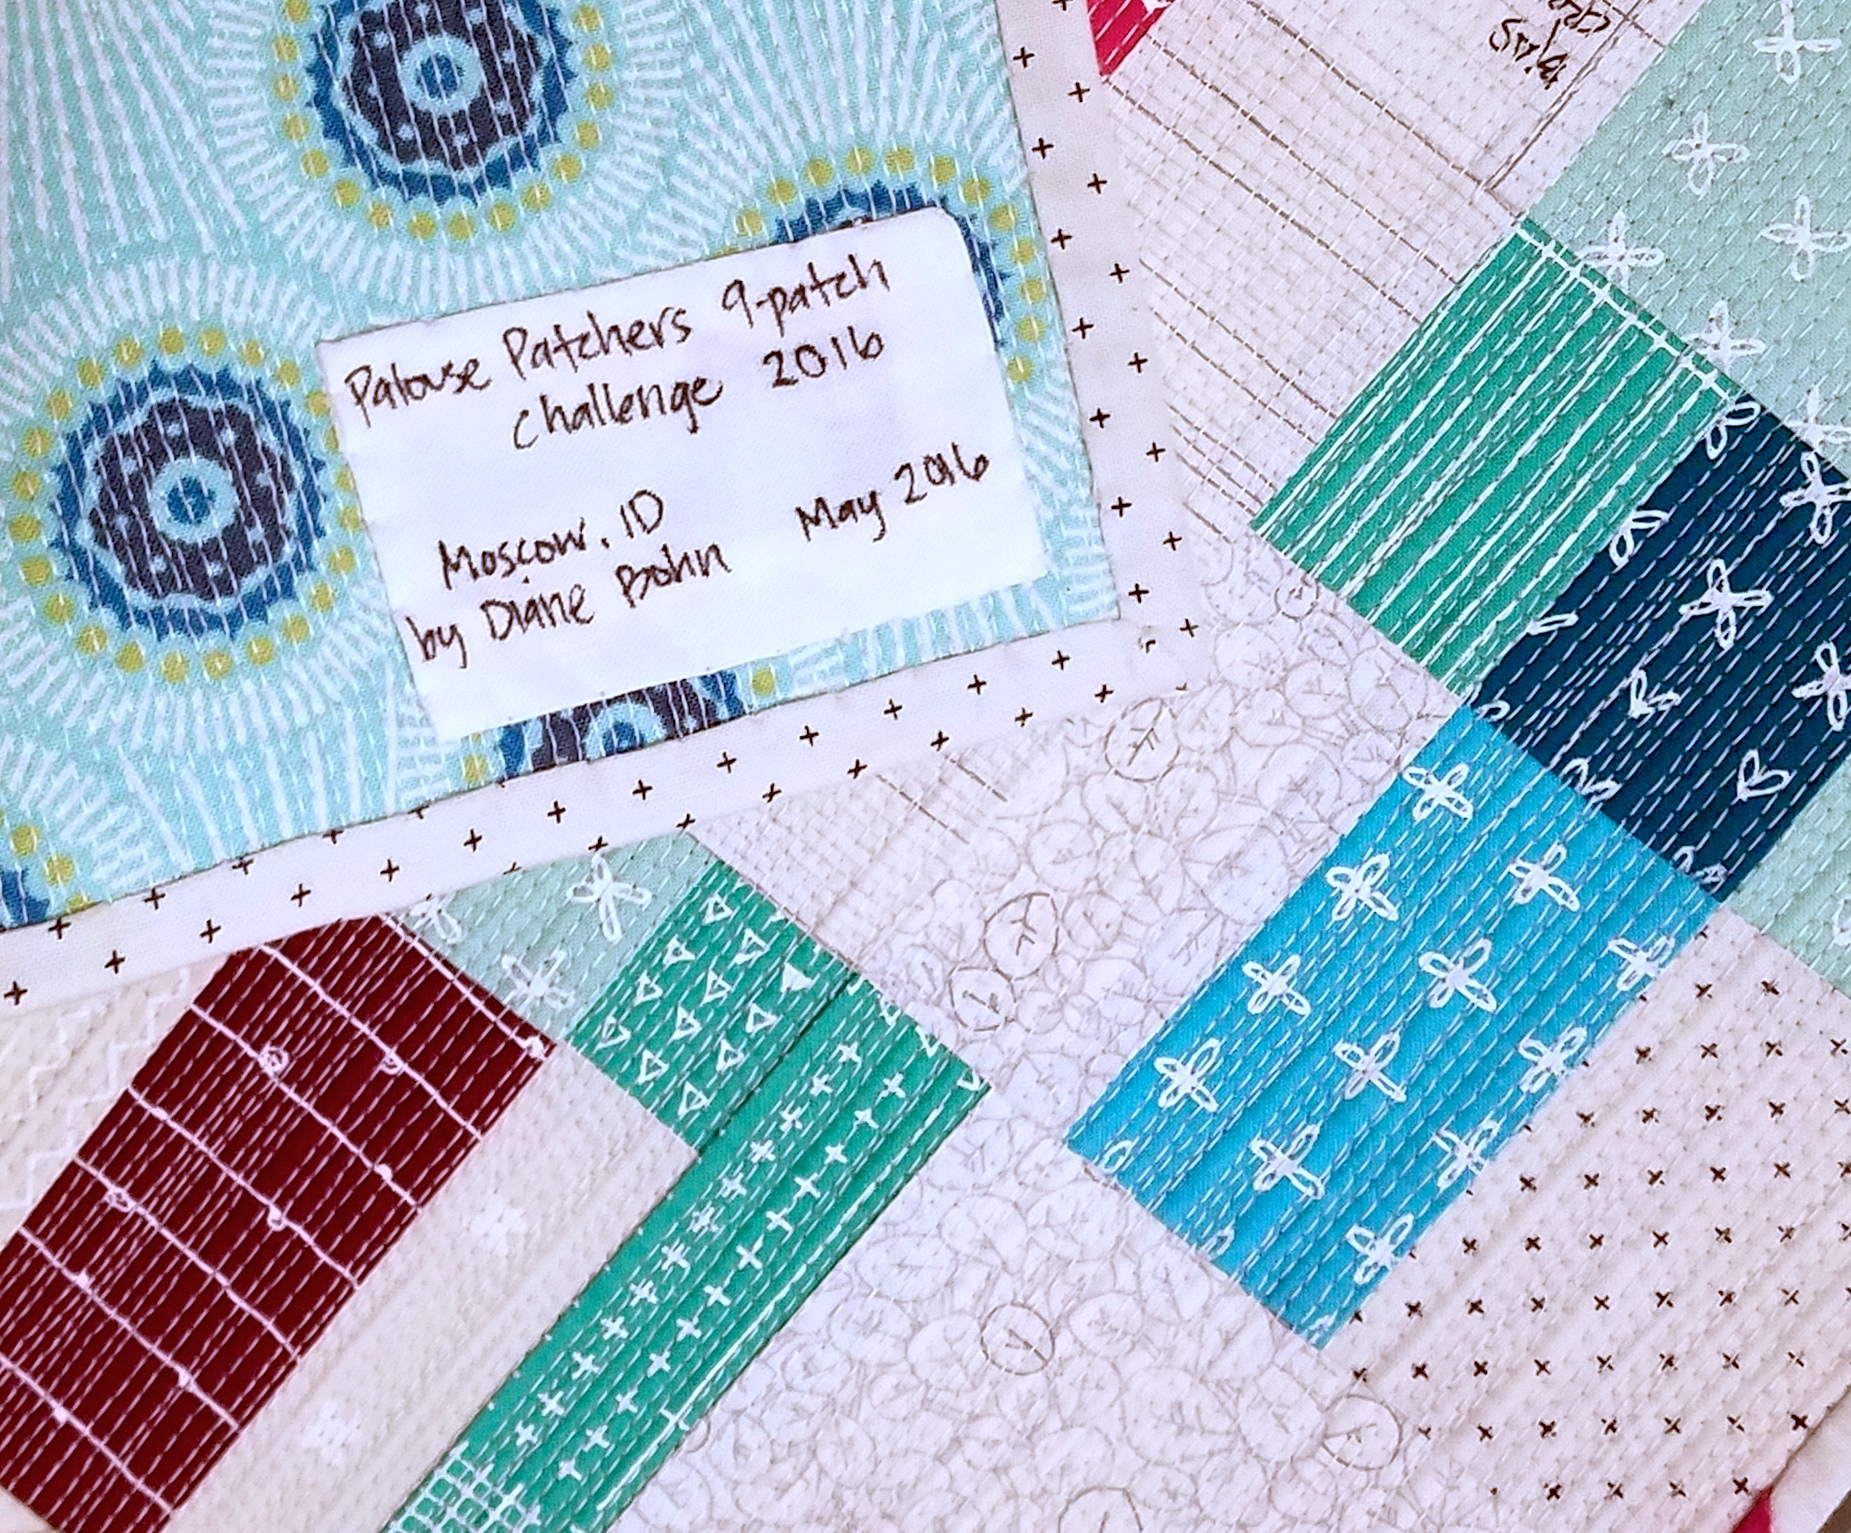
This mini quilt was part of a guild challenge, so I added that info onto the label. It’s fun to be reminded of that.
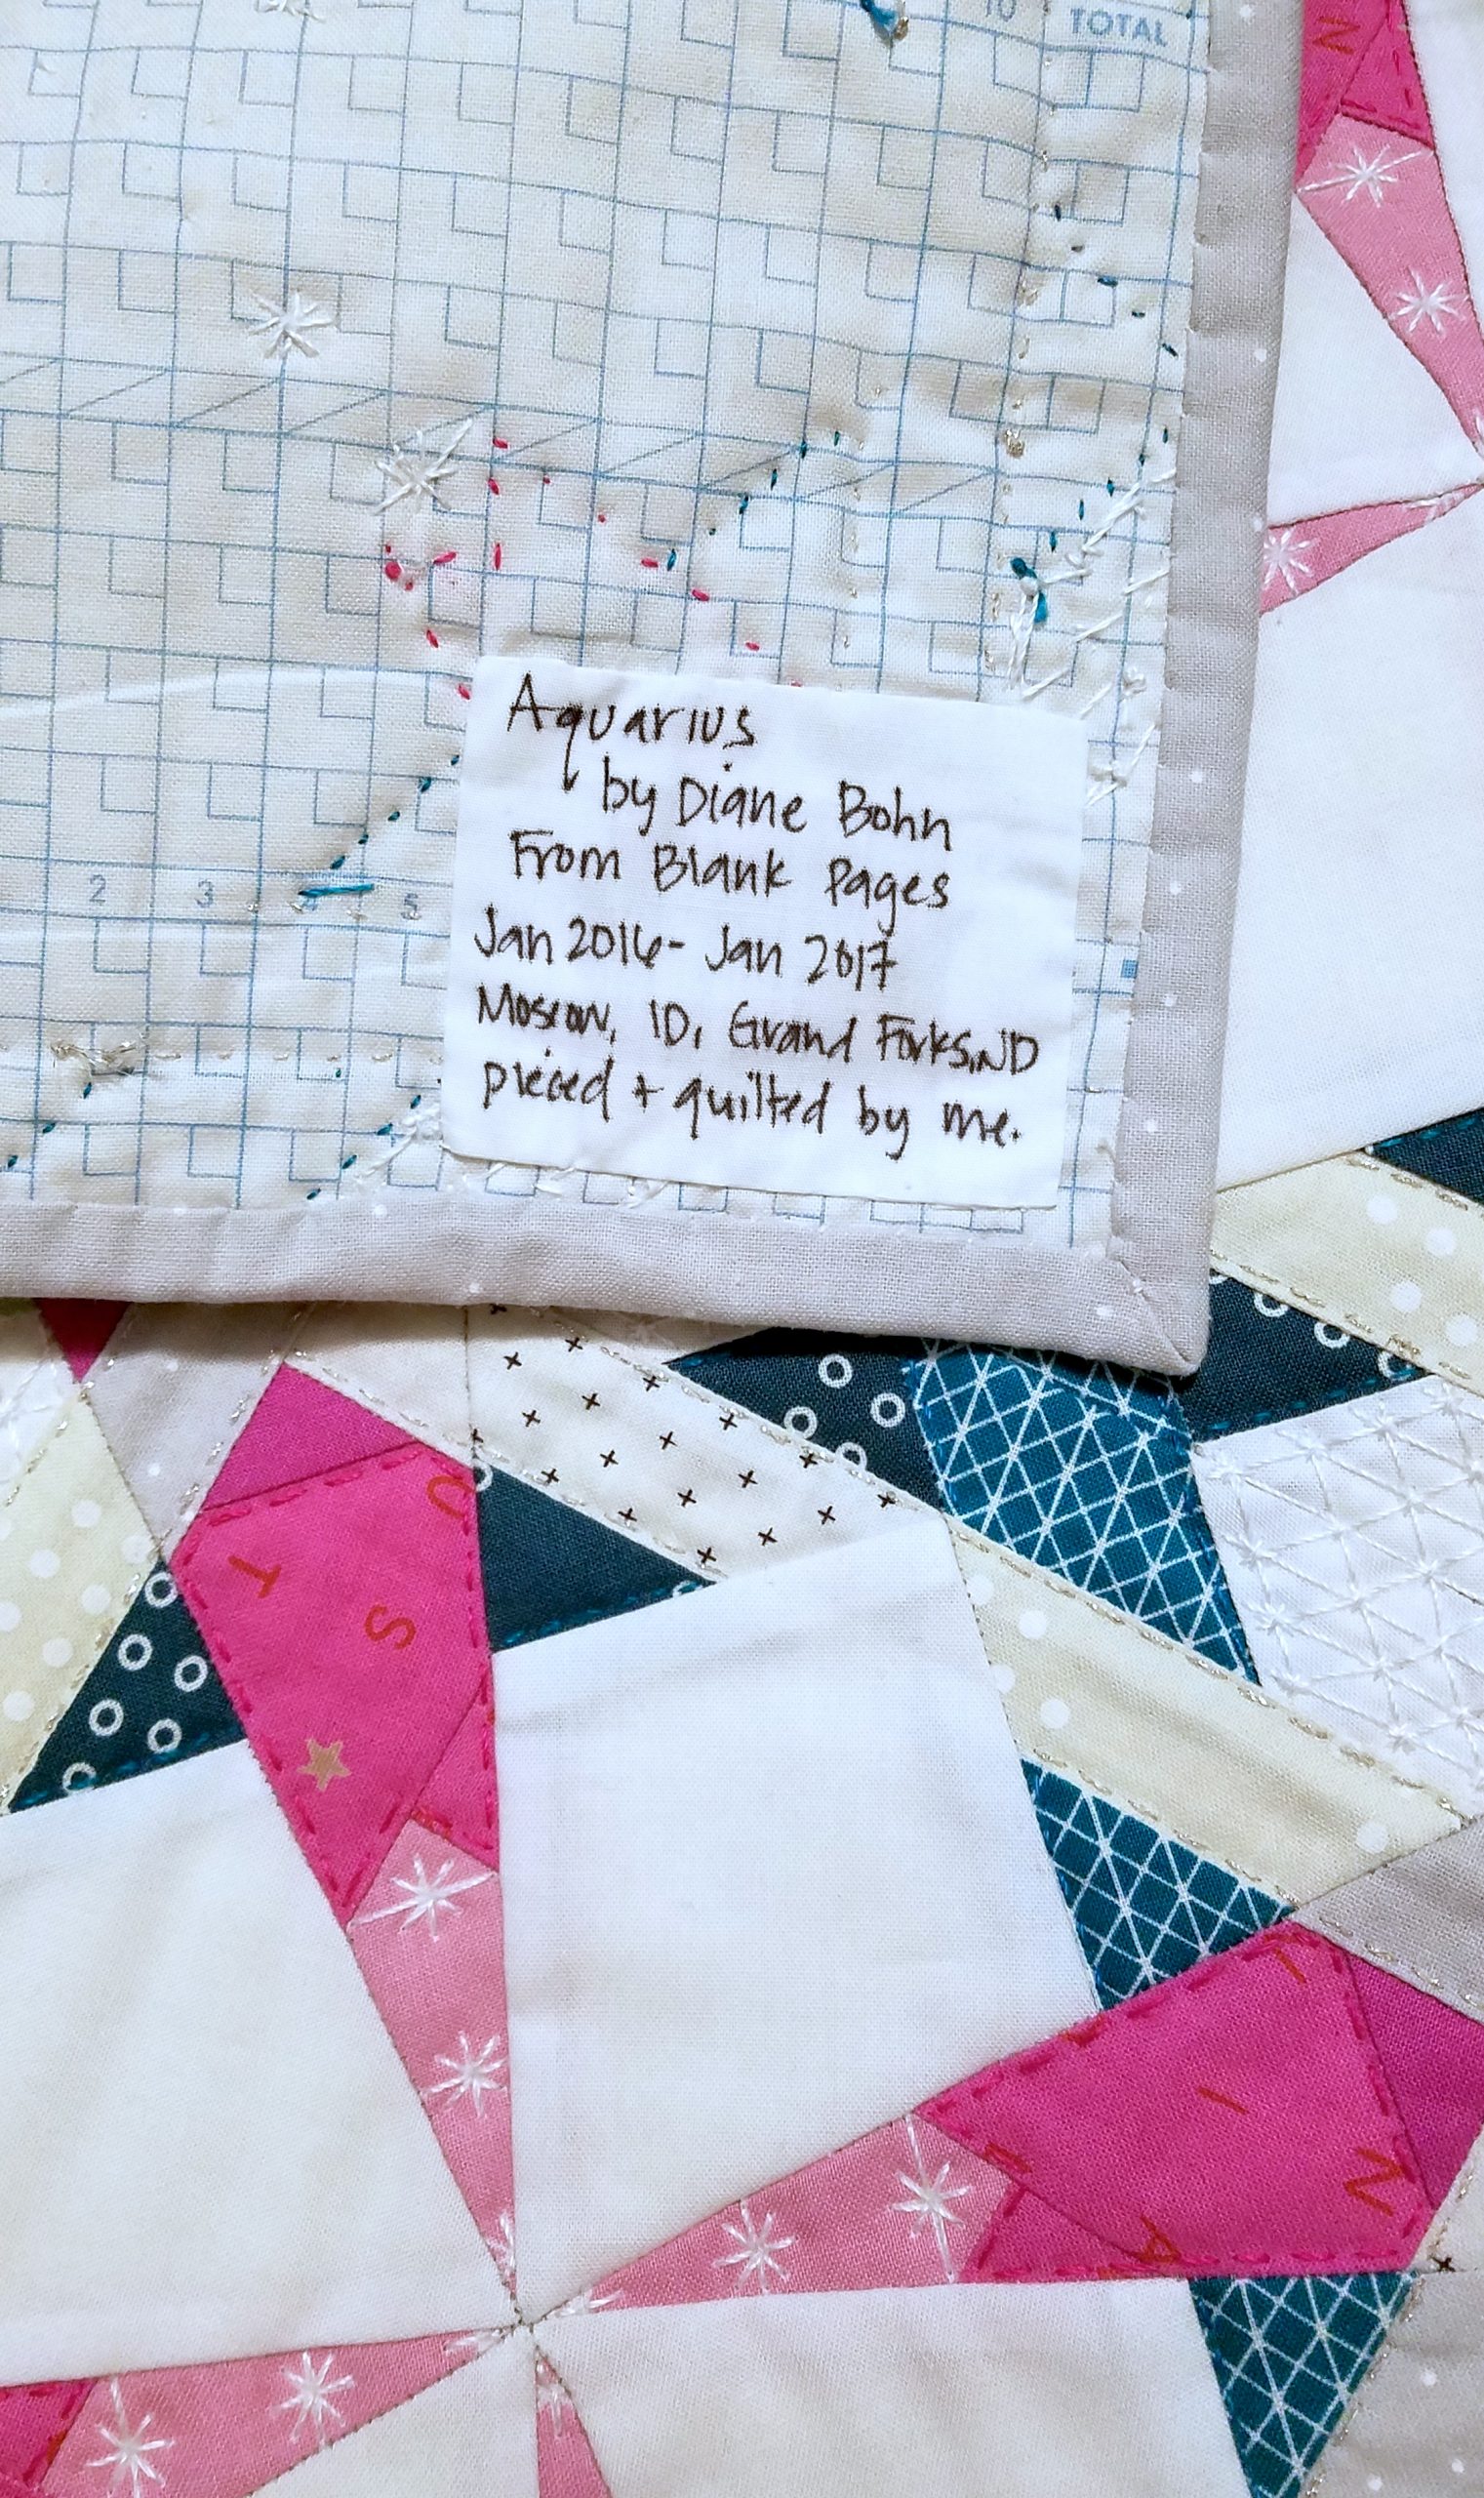
You’ll notice that the dates on this mini quilt span a year! I would take this mini quilt with me whenever I would take my boys to cub scouts, and I would work on it (the hand quilting) while I waited and chatted with other parents. Only working on the quilting during that 1 hour a week did drag it out that long.
I did start and finish the quilt top while we lived in Moscow, ID. But then we moved to ND and that’s where I hand quilted it.
Lots of good memories come from a simple quilt label. 🙂
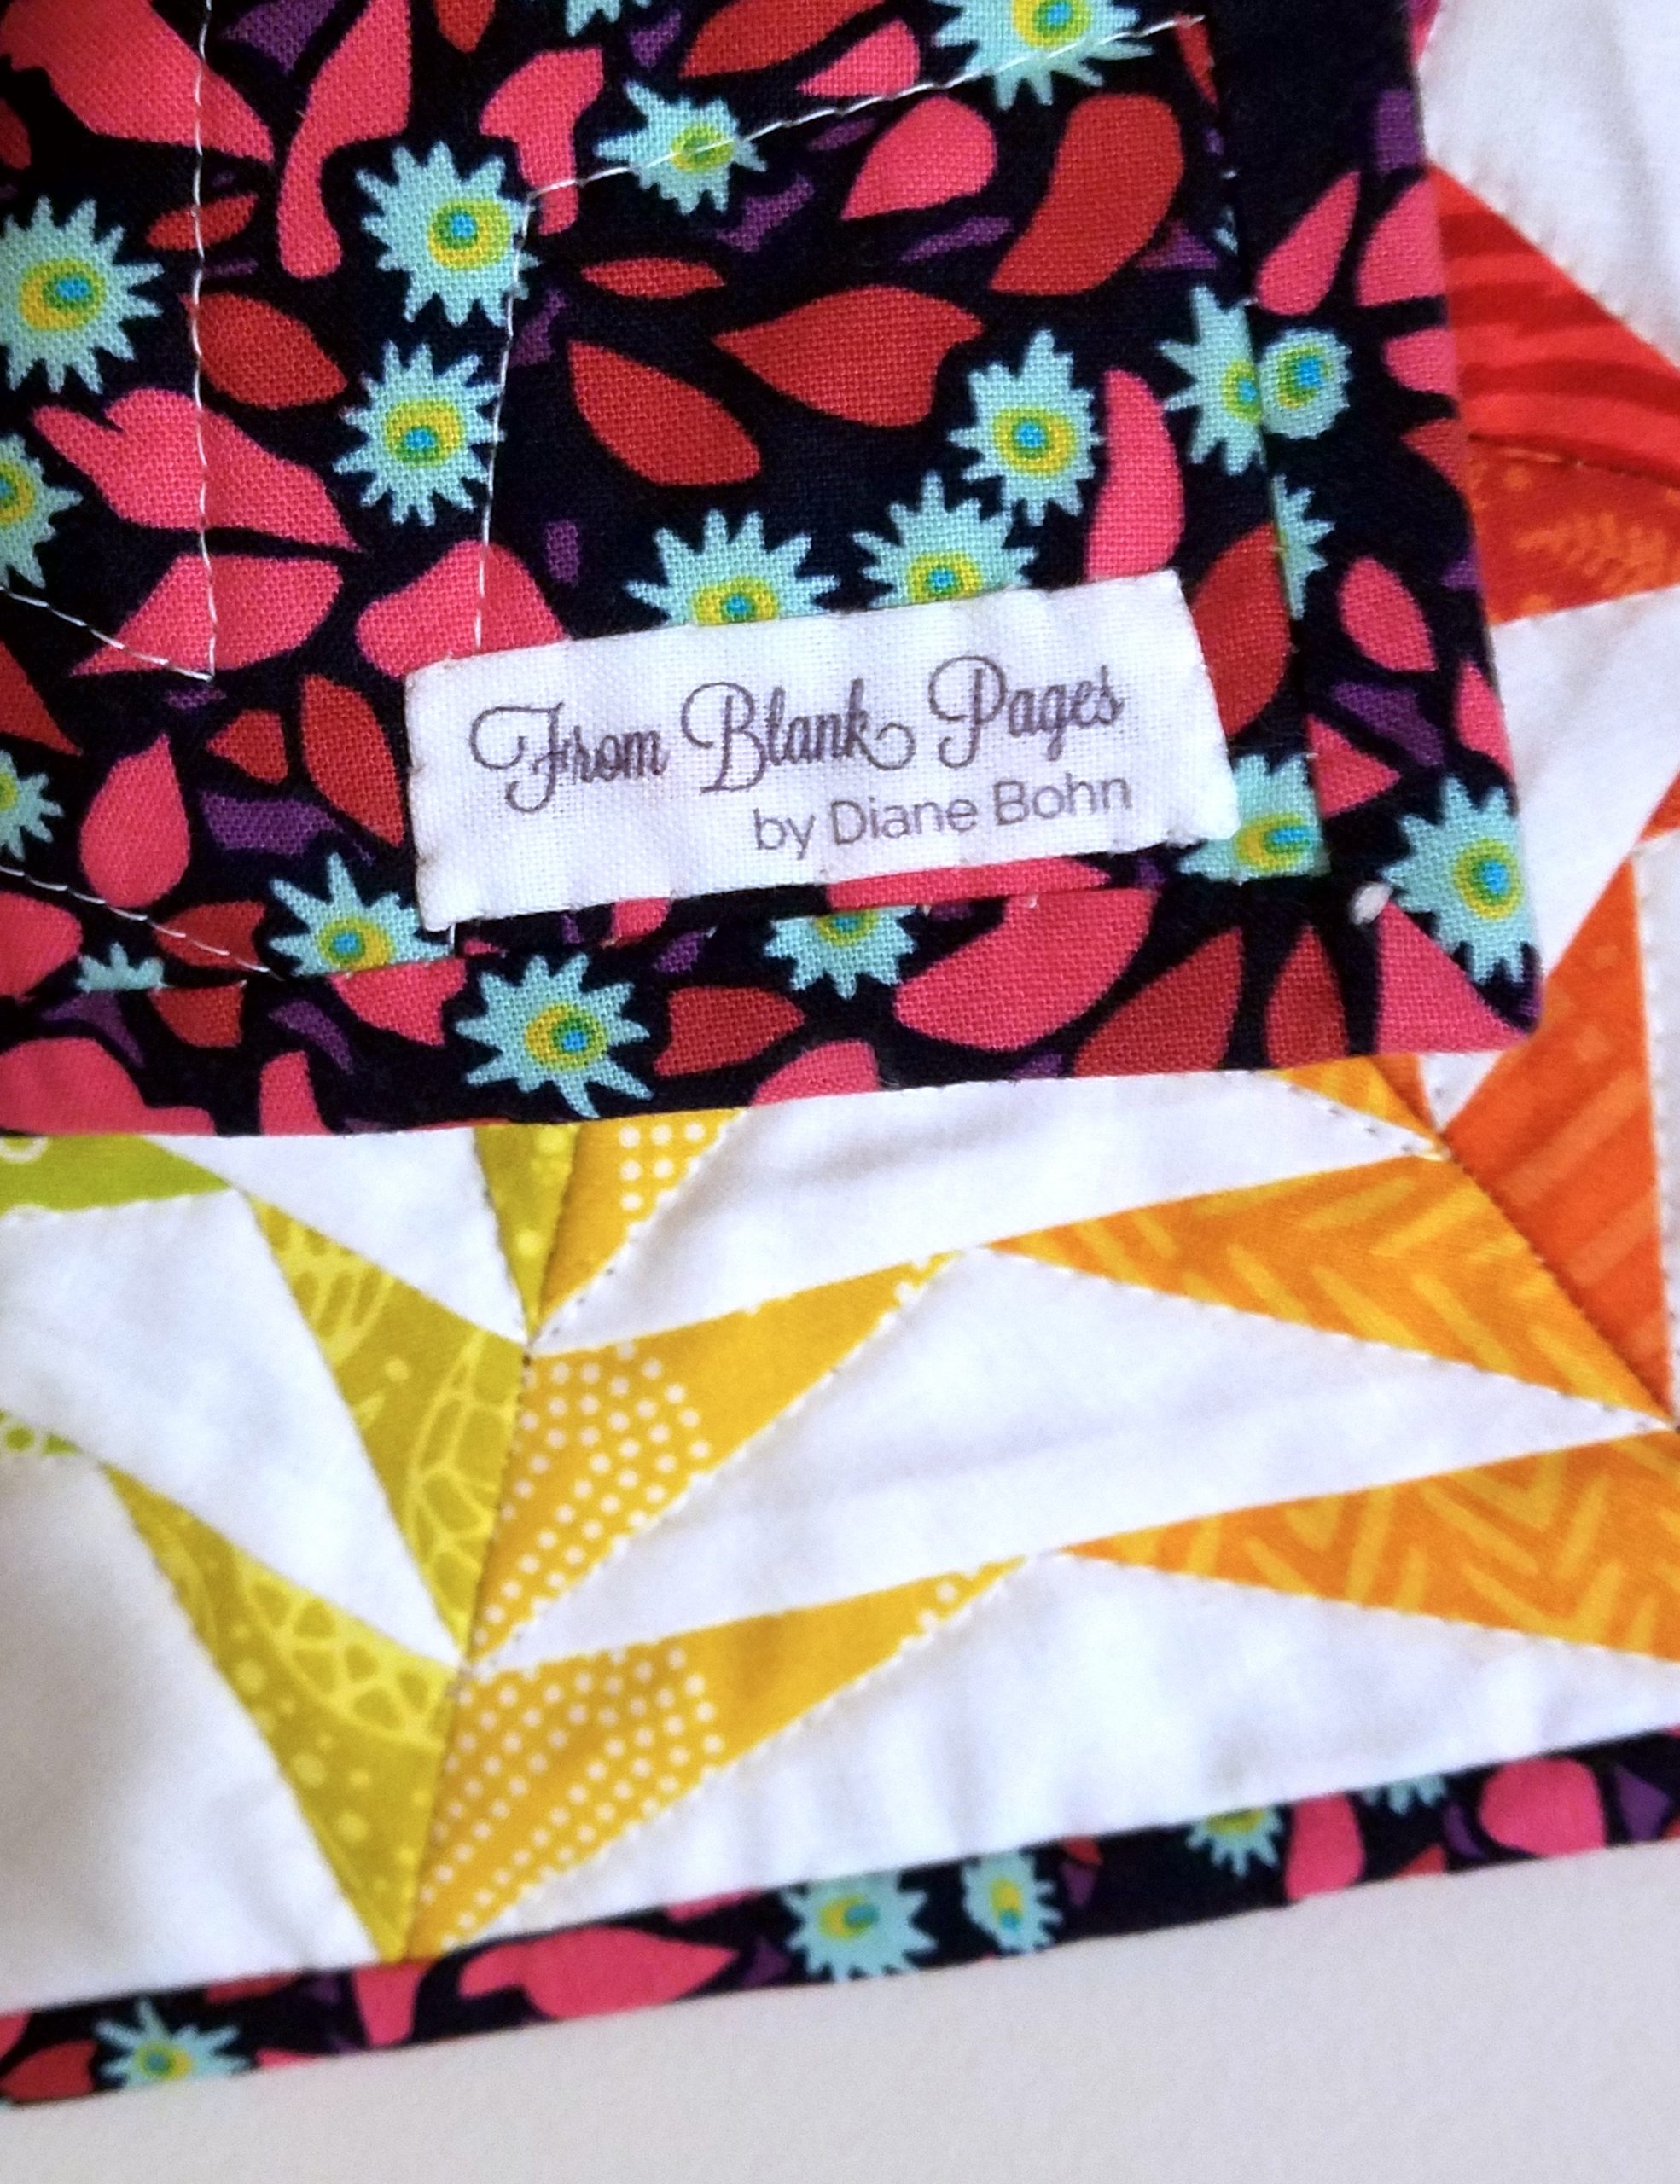
I also tried my hand at printing labels on my own printer. I like these a lot, but then I changed the font of my brand, so I don’t use them anymore. lol. You can google how to print fabric using freezer paper. It does take some trial and error too. And I do recommend heat setting anything that comes out of your printer too.
As you can see, I like to include a lot of information on my labels. Especially since I design my own patterns, I like to include the pattern names.
Here’s the basic info I always include on my labels:
- Name of each person who contributed
- Date made (start and finish if it took a long time)
- Place made
- Name of pattern (if it’s a special pattern, I don’t do this for a traditional block
- Recipient name, or purpose of quilt.
- Any other details or memories related to the quilt that I want to remember.
Does that seem like a lot to put on a quilt?!
It might be. You can also create a quilt journal to keep all the details in, and then only include name, date, and place on the quilt.
The beauty of a quilt label is that it’s all up to you what you put on it!!
Did someone say quilt journal??
Years ago I made a quilt journal and sold it for a little while. Then I stopped.
Writing this post reminded me of it, so I uploaded it to my freebies for my Creative Lounge members to enjoy. You can join the Creative Lounge (aka my newsletter) by signing up HERE, or anywhere on my site where there is a signup form.
Here’s a very special quilt label that my daughter helped me make. I put this on her friends quilt that we made for his family. (We used the sharpie markers that are made specifically for fabric.)
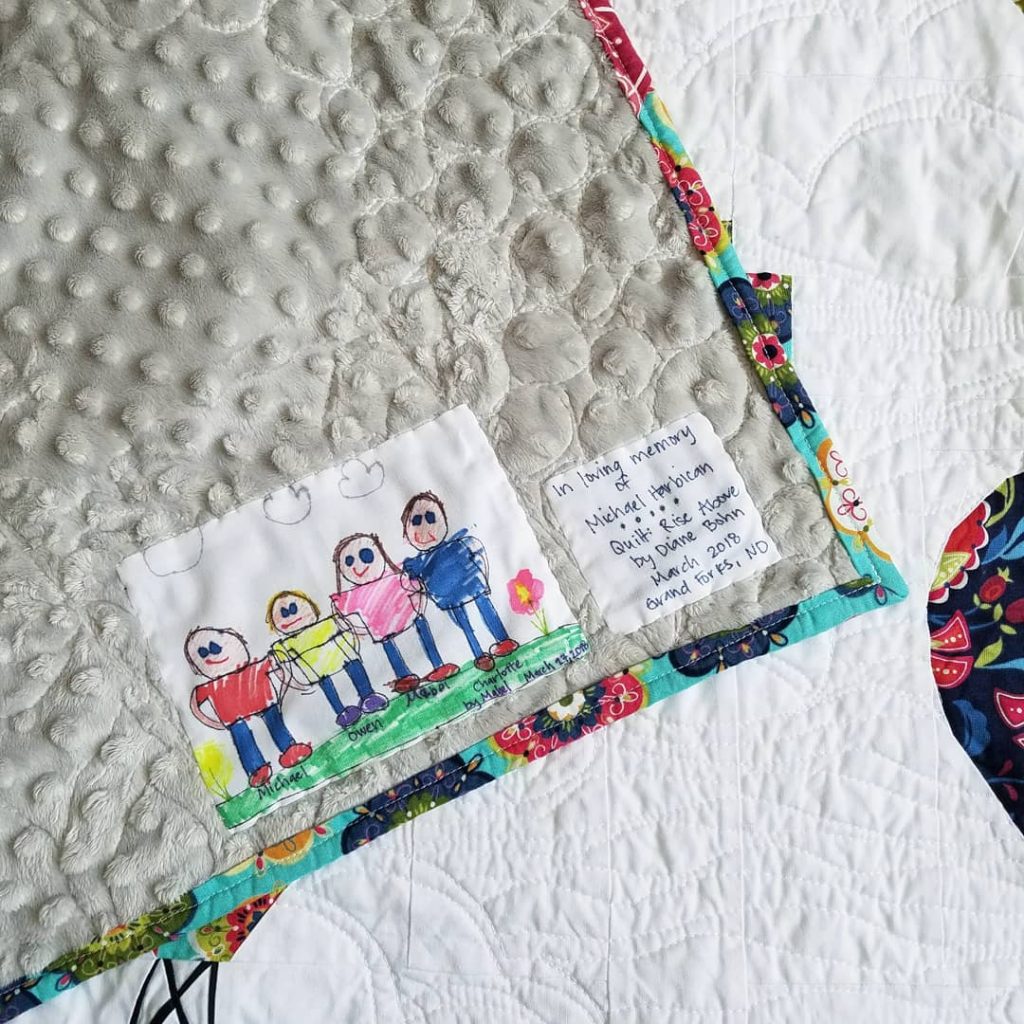
My daughters label was definitely the best part of the quilt.
Usually I wouldn’t put the name of the quilt pattern on a gifted quilt like this, but the name of the pattern, Rise Above has so much meaning to me that I felt that it’s fitting to include the name, to remind us that we can Rise Above whatever trials we’re facing in life.
One final idea...
I have one more example of how you can label your quilts.
You can stitch it on. For this quilt, which was a Christmas present, I stitched the label onto the binding using my machines alphabet letters.
It took some practice to get it right, so definitely play around with it first before you actually sew anything. But I think it turned out fun!

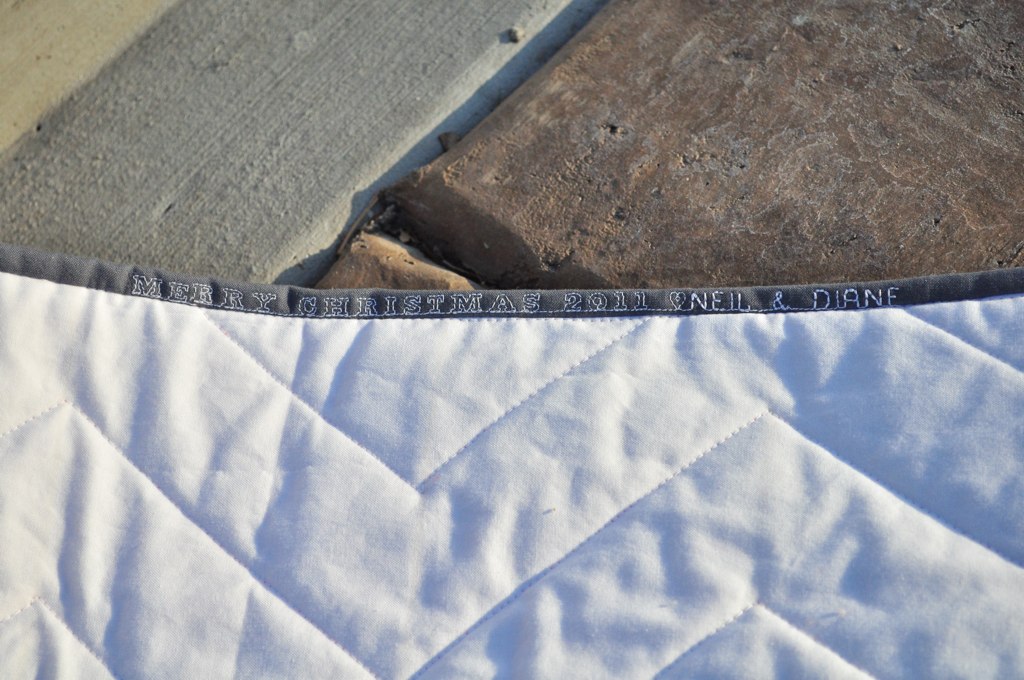
I hope this gives you some ideas on how you can OFFICIALLY finish your quilt by adding the quilt label. 🙂
A lot of people shared some good ideas in the Facebook group too! You can see what they said HERE.
Homework
Once you’re finished with your quilt, make sure to add a label! Remember, there is no right or wrong way to add or make a quilt label, so do what you want to do. 🙂
- Join the Conversation
Join the From Blank Pages Community on Facebook to see what others are making, give feedback on others questions, share your progress and plan, get inspired, and meet other awesome quilters!
If you’re on Instagram, tag me, @fromblankpages, and use #fbpRiverPond so we can all see what you’re up to and comment!


