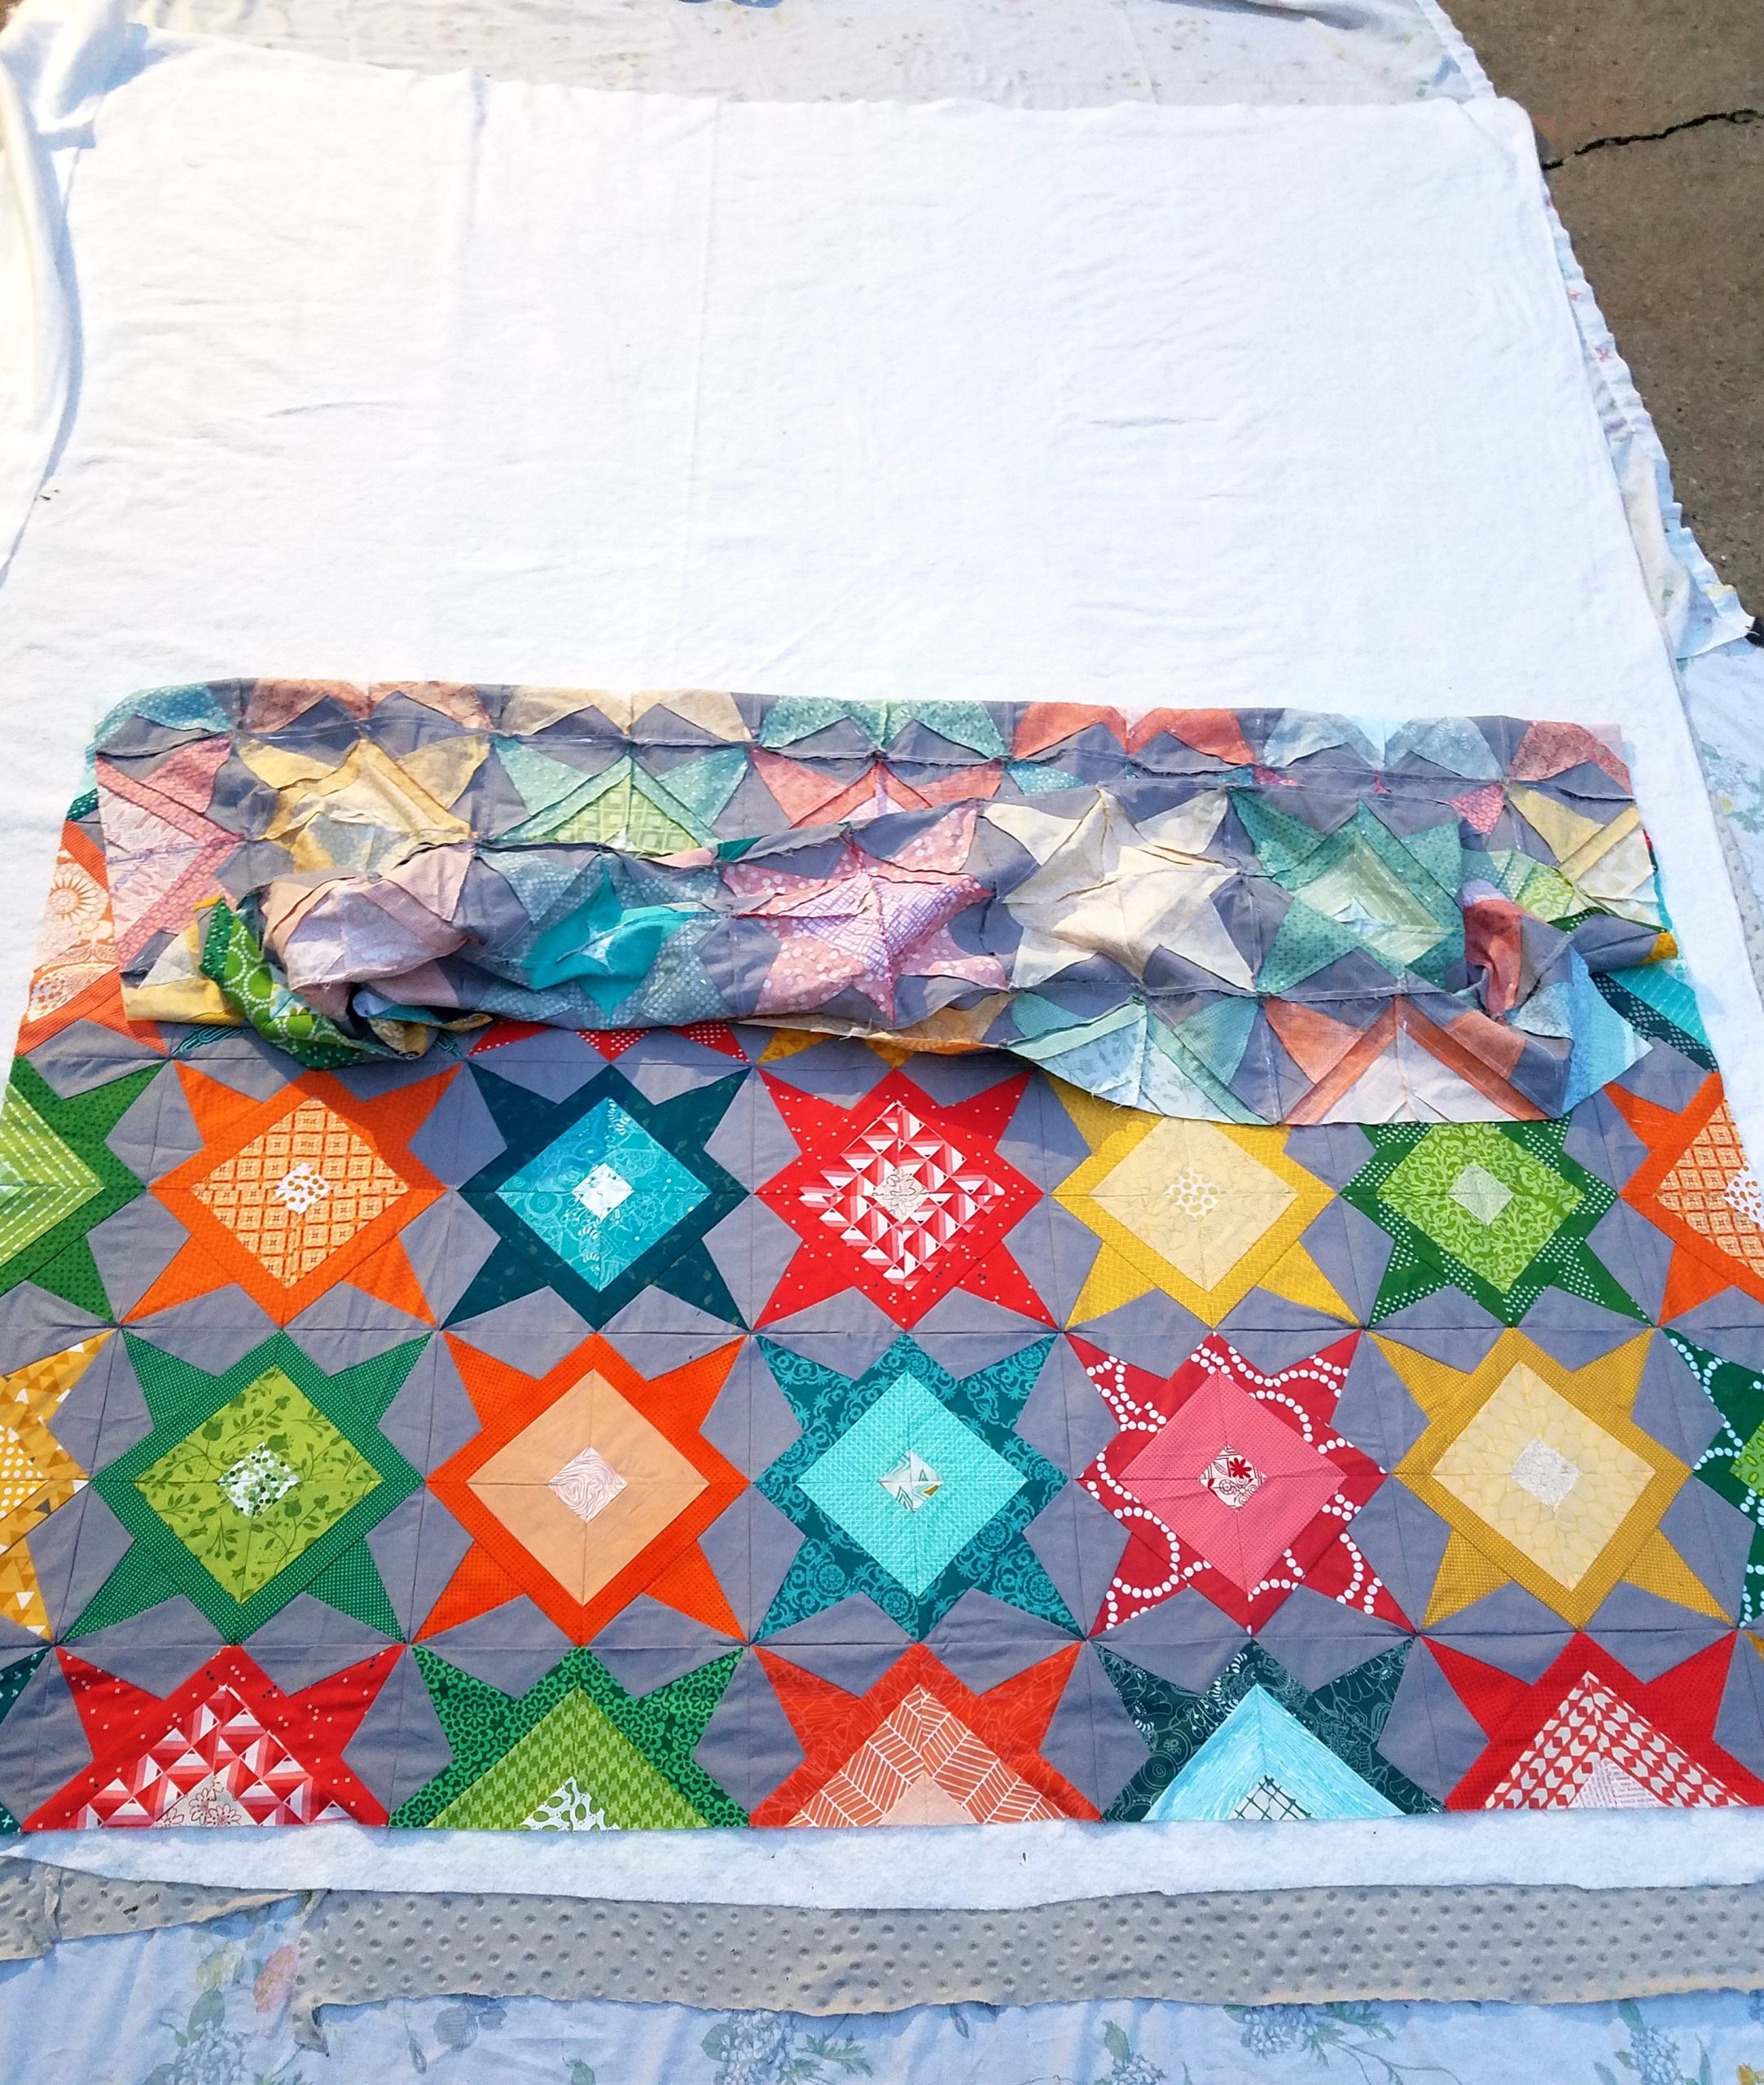
This post is part of the River Pond Quilt Along. You can find more info and the schedule HERE. While this content is directed toward the River Pond QAL, the same concepts can be applied to any quilt that you are making.
You can purchase the River Pond pattern HERE.
The pattern I’m using for this tutorial is a block from my Rockstar pattern. The patterns for the quilt in the video are from the Rise Above collection.
Baste Quilt
AHH! Is this a scary step for you?? It doesn’t have to be. Take a deep breath and relax. 🙂
There are so many ways to baste your quilt, and you are welcome to search for a variety of tutorials of different methods so that you can find the technique that you are most comfortable with and will like the best.
This is the first time I’ve basted a quilt in our new home, and it took me a bit to figure out the best place to do it. (We have brand new floors and I did NOT want to get spray basting glue all over them!) Originally I was not going to do a tutorial, but I wasn’t able to find a tutorial that shows exactly how I like to do it, so I did take a short video that will hopefully help walk you through it.
I will share two links for tutorials that I do like and want to try in the future. I do prefer to spray baste, so these are both spray basting tutorials (verses pinning).
Christa Watson at Christa Quilts has great tutorials for:
- spray basting on your design wall (https://christaquilts.com/2017/12/07/wall-basting-tutorial-using-spray-adhesive/) as well as
- spray basting on a table (https://christaquilts.com/2018/04/02/spray-basting-tutorial-using-a-table/).
Because I am using minky for my backing fabric, I didn’t want to try either of these because I didn’t want the minky to stretch with the weight of hanging and not baste flat. I have been using minky for my backing fabric for years and I LOVE it!! We all love the softness of cuddling under it, and it’s my go-to. I’ll include my tips for using minky below.
My Spray Basting Method with Minky Quilt Back
I don’t know that this will be the most thorough tutorial, but I’ll try to explain the pictures well and fill in the gaps.
Before we start, I want to point out that I cut my backing and batting a minimum of 2 inches wider on each sides (4+ inches total) than the quilt top. You’ll need some wiggle room to make aligning the layers easier, as well as to give room for shrinking while quilting.
1. To start out, find a good place where you’ll be able to lay out your quilt and have room to walk around it.
I’ve always set this up in our kitchen before but now we have nice new flooring and actually own our home. We always rented before and the kitchens always had linoleum floors which were easy enough to clean – and we didn’t care so much (is that bad?? lol). Since it’s nice outside I decided to do this outside. I swept the ground and made sure there weren’t any rocks or dirt in the space.
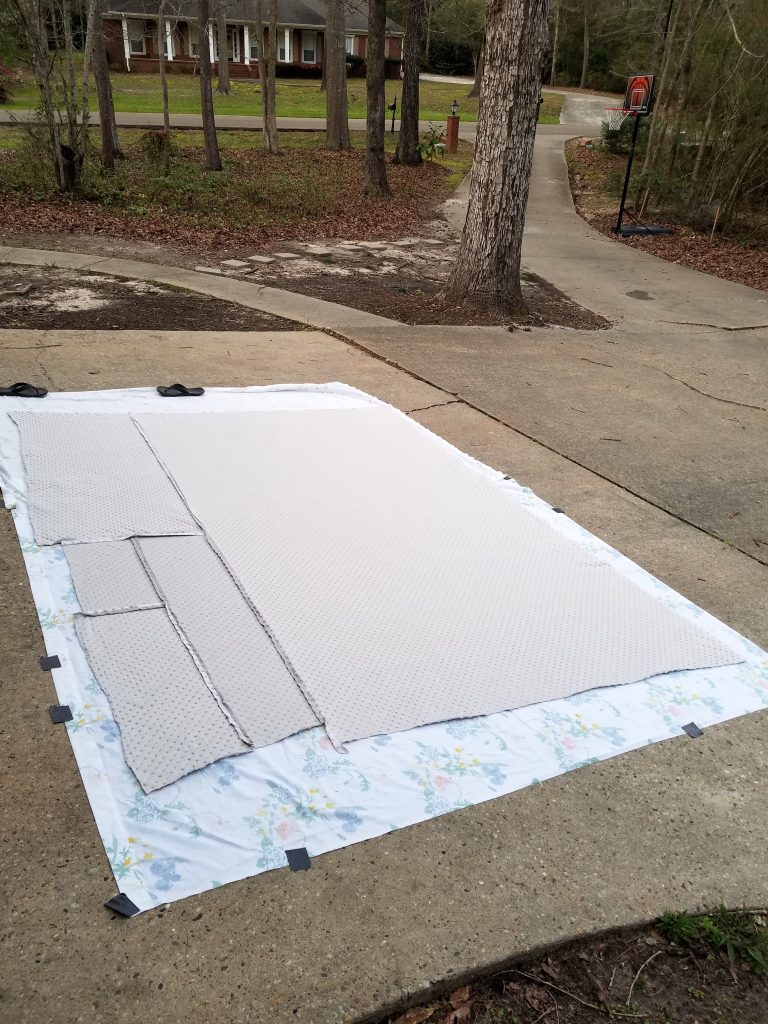
2. Lay out an old sheet (or multiple sheets if you have a big quilt). I bought some sheets for super cheap at the thrift store years ago. Tape down the edges (I use duct tape and actually leave it on the sheets. I’ve reused the same tape for many basting sessions.)
You’ll want to make sure the sheet is tight and secure so there aren’t any bunches in it.
3. Carefully spread out the minky backing. Rather than pull it smooth I pat it into place. Pat out the wrinkles, and shift it into place by gently tapping it and moving it just a little at a time.
Minky is so stretchy that you really want to be careful that you don’t distort it, otherwise it’ll bunch weird when you add each layer of the quilt sandwich – and that’s a mess to quilt..
Here’s the picture of what my setup looks like at this point. You can see that I pieced that lower left corner of my backing, which works! I wanted to use up some of the smaller pieces I had left over from previous backings. (This quilt will be my sons bed quilt, and I know he won’t mind, otherwise I’d probably make it a little nicer.)
4. Baste the batting layer.
For this next step I deviated from my normal method, following Christa’s method above of spraying the entire back at once. That’s a great way to do it if you are going to follow her entire method, but it ended up being a hassle for me… I’ll explain why below.
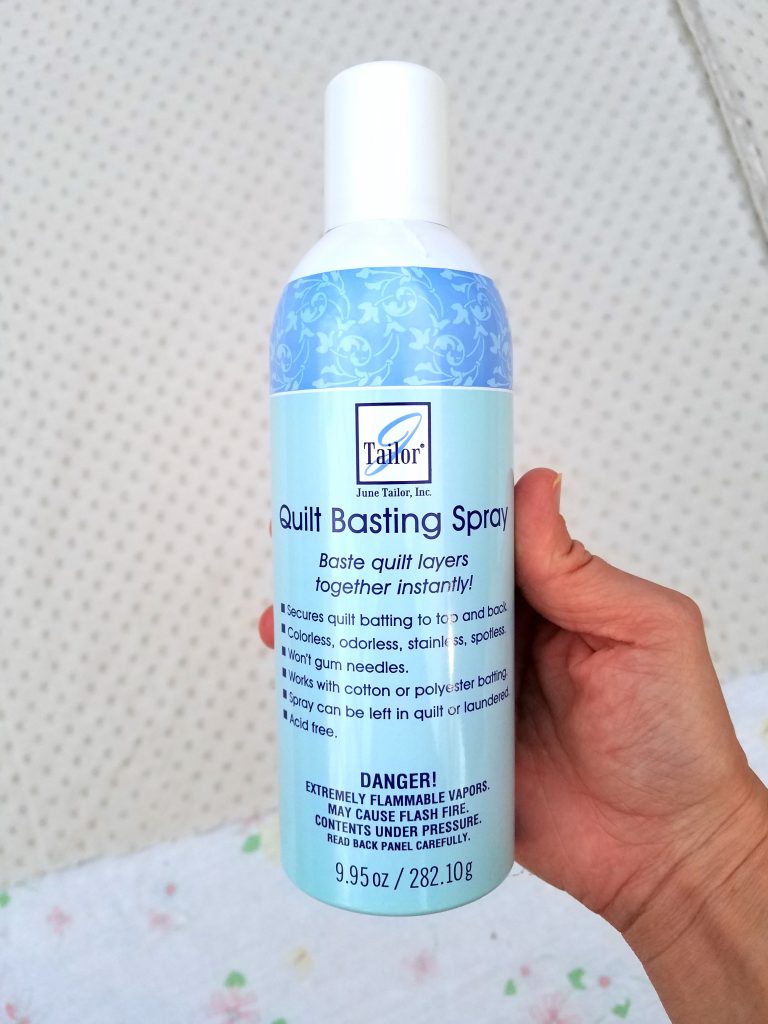
Here is the basting spray that I like to use. It sticks well – as in I can spray baste a quilt, fold it up, leave it in a corner, and a year later it’s still holds well, or like with my Zodiac Quilt, I can do a lot of specific FMQ all over the quilt, and no matter how much I scrunch it up and move it around, it still holds.
I’ve used the 505 spray that was really popular for a while, but it wouldn’t even hold a mini quilt for me before I finished quilting it. I did read in Christa’s tutorial that she irons her quilt sandwich after basting it, and I wonder if maybe it’s heat activated – I never ironed mine before quilting, and perhaps that was the problem. ?? So if you use the 505 spray, try ironing it and hopefully you’ll have better luck with it than I did.
5. Baste the Quilt Top
I am going to skip to how I basted the quilt top, and then that’s how you’ll want to do step 4 to baste the batting layer. (So for the batting layer, every time I say “quilt top” replace that with “batting”.)
a: spread out the quilt top on top of your other layers, spreading it out so it’s nice and smooth and make sure it’s aligned properly. I cut my batting and backing at least 4 inches wider than the quilt top to make it easier to make sure everything is overlapping.
Here’s where I had trouble with the batting layer – because I sprayed the entire back of the minky first, I could not adjust the batting once I layed it down. It might be easier if you were using quilting cotton for the backing, but in the place I did try to adjust, it really scrunched up the minky, so I pretty much had to leave it where it was – which ended up leaving one corner of my quilt top without a backing, and one corner without batting. I will fix this as I quilt it, but it does make it kind of a Frankenstein quilt… I’m ok with it, and I know my son won’t even notice, so it now becomes a part of the history. And I like that about making things. 🙂
I did get the batting smooth, which is what is most important. Anyway, let’s move on…
Below you can see my quilt top centered on the backing and batting layers.
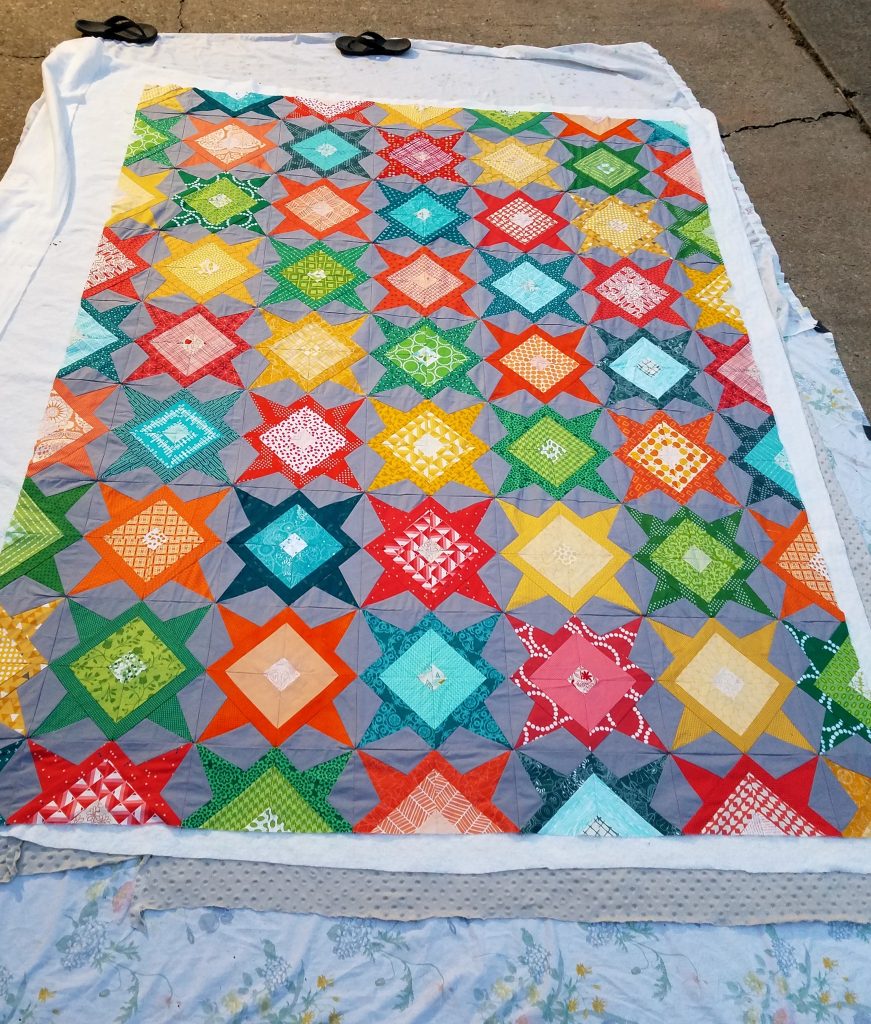
b. Next you want to pull back half of the quilt top like so.
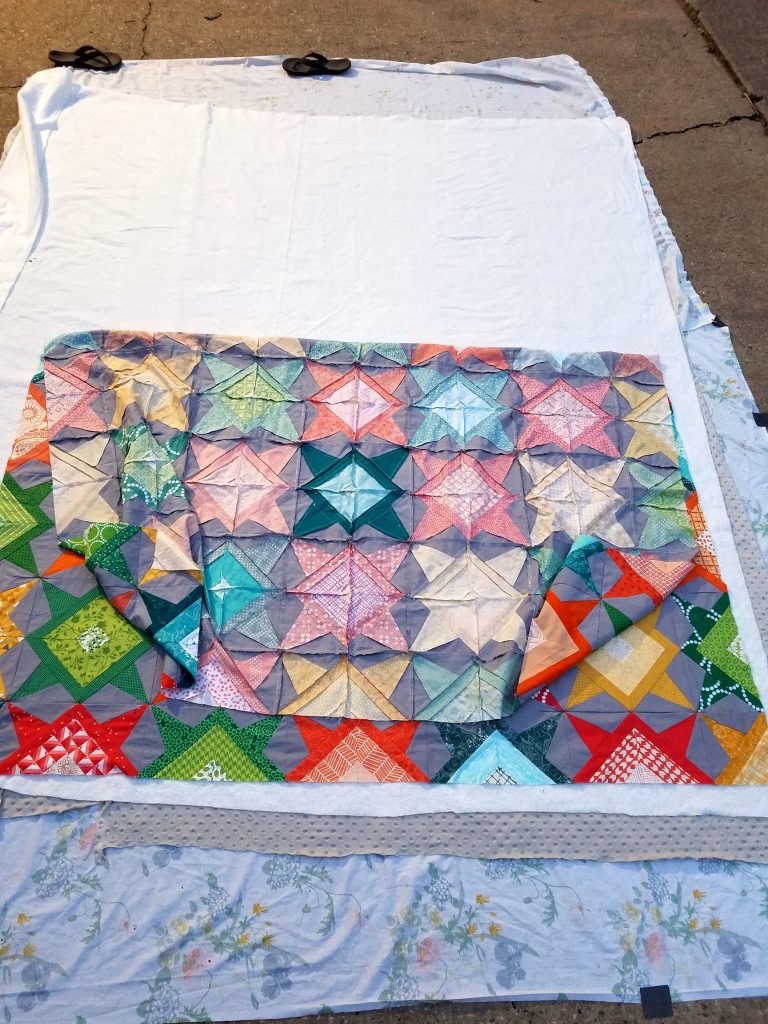
c. Then I actually scrunch it up a bit because you’re going to be kneeling on the side that is not pulled back and then spraying a section of the batting, then carefully pulling the top back over so it’s smooth where you sprayed.
(uh, that didn’t make any sense did it?!)
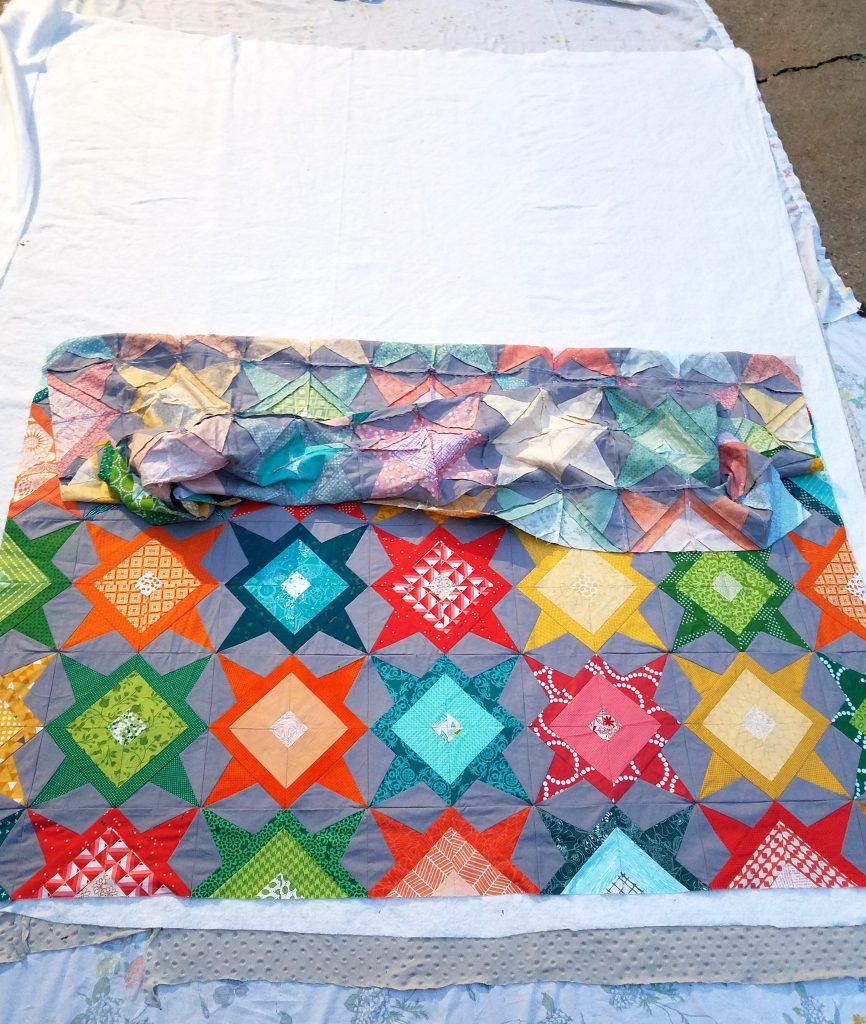
I put together a video showing my complete process, so hopefully seeing it all together will help it make sense! (and yes, I’m using a different quilt for this. lol. The video I took while basting my Rockstar quilt cut off early, and I’m determined to provide a good tutorial for y’all!!)
The video is sped up, and I spoke over it to walk you through what is going on. Yes, I wrote the steps differently in the slide than what I spoke. lol. It doesn’t matter. Either order works. 😉
Any questions??
If anything doesn’t make sense, or you have a question about a step, please ask in the comments below. (I’ll answer there so others can also see your question in case they have the same one.)
Once you’re done basting your quilt then you’re ready to start quilting! I’ll add some posts about quilting ideas next!
Homework
The next assignment is to piece your backing, cut your batting and use your favorite method to baste your quilt.
- Join the Conversation
Join the From Blank Pages Community on Facebook to see what others are making, give feedback on others questions, share your progress and plan, get inspired, and meet other awesome quilters!
If you’re on Instagram, tag me, @fromblankpages, and use #fbpRiverPond so we can all see what you’re up to and comment!


