Celestial Star QAL: Trim and Join
Today's Topic: Trim and Join
Assignment: Trim all your sections, join the inner pieces to the outer pieces
TRIMMING
Today's topic is pretty simple! If you watched the video for paper piecing last week, I've included the trimming instructions at the end. Here is a 2 minute clip of just the trimming section, if you prefer watching videos, otherwise, I've included the instructions with photos below. While it's pretty self explanatory, the most important thing is that you create accurate 1/4" seam allowances, otherwise your points won't match up correctly when joining the wedges.
How to:
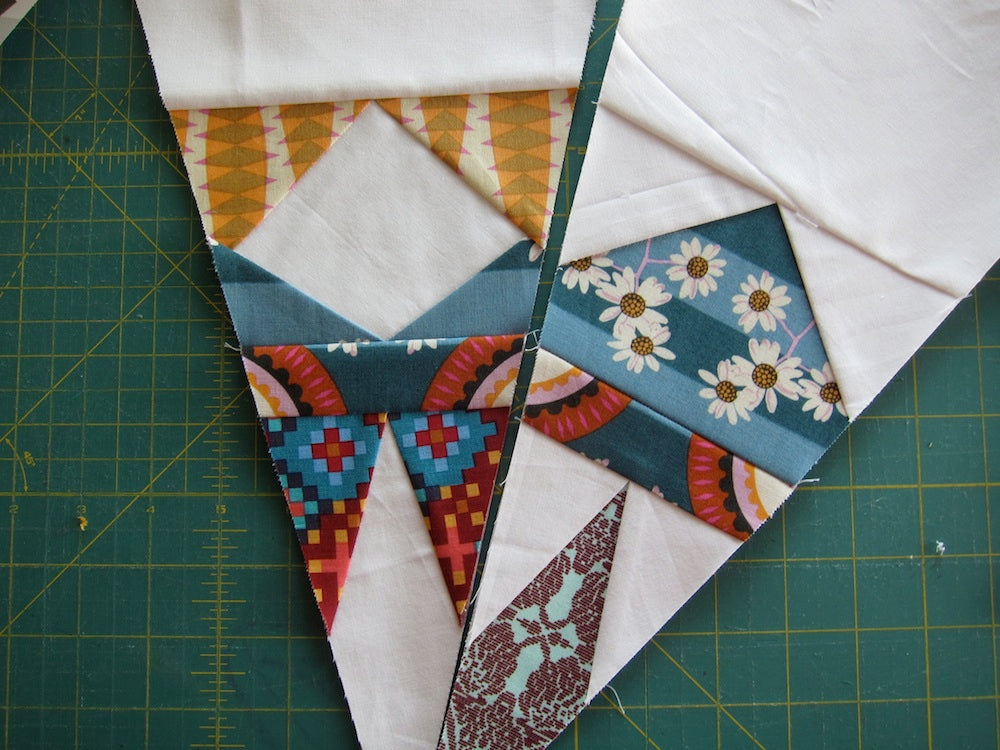
We'll start with the inner piece, then I'll show you with the outer piece. Then continue with joining. Here is my inner section:

Front
1. Turn it over your pieced pattern so the paper side is up.

2. We are going to measure the 1/4" seam allowance from the INSIDE line (marked with the yellow highlighter) of the pattern border.*

*It is so important that you measure and cut an accurate 1/4 inch seam allowance at this point. The printed seam allowance should be accurate, but if you did any scaling when printing, or trimmed it too narrow when cutting your pattern, it could alter that 1/4 inch amount. If you don't have an accurate seam allowance, your wedges will not line up properly, and your points will not match.
3. Line up the 1/4 inch markings on the ruler with the inner border (marked with yellow).

4. Trim, using a rotary cutter and cutting mat. Repeat with all sides. Below shows after trimming.


5. Make sure to trim the little corners. Line up the ruler with the outside line of the seam allowance. These trimmed corners make joining the segments a breeze when it comes to aligning them.

6. Repeat until pattern piece is completely trimmed.


7. Now we'll repeat these steps for an outer pattern piece.


The back. Line up ruler with inside lines (marked in yellow)

Line up 1/4" markings on ruler with the inner line (marked in yellow). Trim using your rotary cutter.


Pattern piece completely trimmed

Now we have two segments that are ready to be joined

JOINING
Joining the inner and outer pieces are easy, but it's important that they are lined up correctly to keep your 1/4" seam allowance accurate through the entire wedge.
1. Once all your segments are trimmed. Take an inner segment and place it right sides together with the corresponding outer segment. This is where those trimmed corners really come in handy! No guess work as to centering them.

2. Draw a thin line of Elmer's glue along the edge of one of the pattern pieces. Then realign your pieces. Press with your iron to set the glue (gives it a stronger hold to prevent shifting). (UPDATE 12/24: I actually don't use glue at this step anymore. I find it easy enough to match up the edges and sew together right away, making sure to keep everything in place as I sew. You can try this method with gluing in this step, or skip it, and see which way works better for you.)

3. Sew on the line (marked with the arrows), make sure your stitch length is set to 1.5.

Here are my pieces after sewing, glue basting REALLY helps to keep the seam in the correct spot on both pieces:


4. Tear off the paper from the seam allowance ONLY!


5. Press to set seams.
6. Open up and alternate the direction the you press the seams.

Finished wedge

Because this wedge does not have seam in the top portion, I am pressing this seam UP.
Here is how I decided which way to press my seams with these blocks. Notice how the wedge on the left has seams that go down into the center seam (where the inner and outer segments join)? And notice how the wedge on the right does not have seams going into that center seam?

The wedge with more seams going into that center seam, I have pressed the seam DOWN. It lays flatter that way as I'm not trying to fold those bunched seams and extra fabric layers. The seams on the right go UP, there are no extra seams so it really doesn't matter. Alternating the direction of the seams will help reduce bulk when joining wedges.

8. Repeat until you have 12 wedges!! :)
And that's it for this post!